The Ultimate Windows VPS login Guide for beginners
How to access Windows VPS Via RDP?
Before diving into the steps you should take to access your Windows VPS using RDP, let's learn what RDP actually is.
What is RDP?
RDP stands for Remote Desktop Protocol which stands tall as one of Microsoft Windows' most pivotal tools, revolutionizing the concept of remote desktop connection. With RDP present in all versions of Windows, it opens the gateway to remote access, enabling users to connect to their computers from afar and work on them effortlessly via the internet.

3 Steps to connect to a Windows VPS using RDP with ease
Establishing a Remote Desktop Protocol (RDP) connection to your Windows VPS is simpler than you might think.
Just follow these easy steps to enjoy seamless access to your virtual workspace:
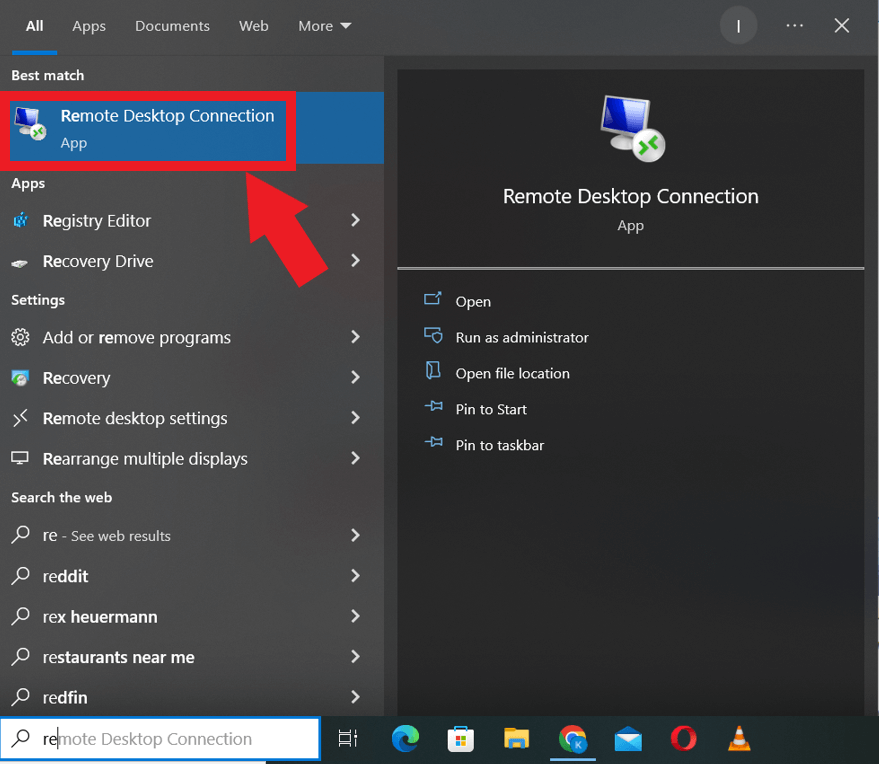
Step 1: Launch the Remote Desktop Connection Software
In Windows 10, accessing the Remote Desktop Connection software is a breeze. Here are three simple methods to open remote desktop connection in it:
-
Method 1: Navigate to the Start Menu, click on "All programs," then "Accessories," and finally, find the Remote Desktop Connection icon. Double-click to open it.
-
Method 2: Press the Windows key + R to bring up the "Run" dialog box, type "mstsc," and press Enter.
-
Method 3: Use the search box in the taskbar to find "Remote Desktop." Click on the application when it appears in the search results.
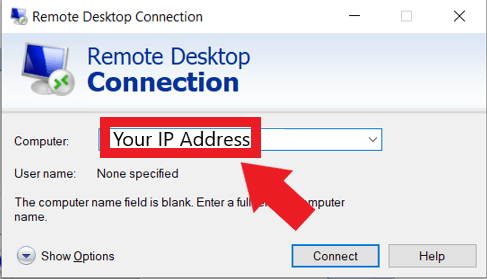
Step 2: Enter the IP Address of Your VPS
Once the Remote Desktop Connection window is open, you'll see a field labeled "Computer."
Enter the IP address of the dedicated server for your Windows VPS in this field. This unique numerical address allows your local device to locate and connect to your VPS over the internet.
Step 3: Provide Your Username and Password
After entering the VPS server IP address, click Connect button. You'll be prompted to enter your VPS username and password. Input the correct credentials, and then press OK to proceed.
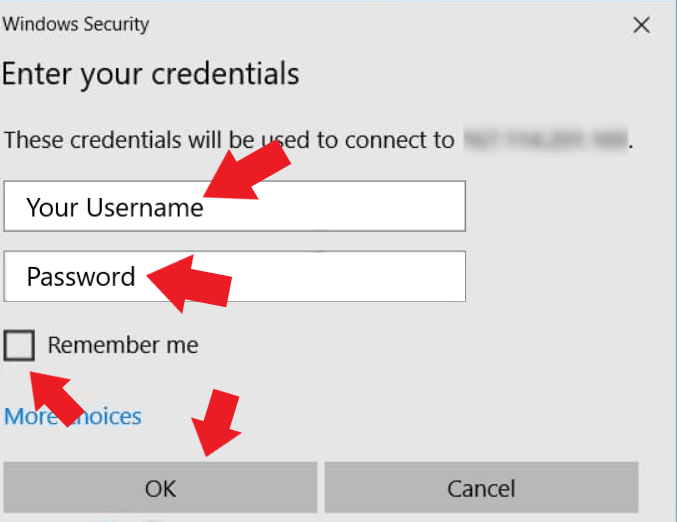
Pro Tip: Save Time with "Remember Me"
For future connections, you have the option to check the "Remember me" box. By doing so, your username and password will be saved, streamlining the login administrator password process for subsequent sessions.
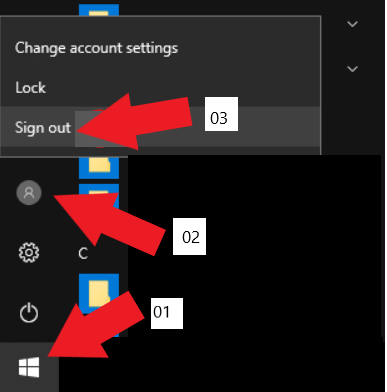
Closing the RDP Session
When you've finished your work on the VPS, it's essential to close the RDP session securely, especially if you are using a public or non-secure computer.
Follow these steps to do so:
-
Click on the Start Menu button on the VPS desktop.
-
Locate the icon that resembles a person and represents the user account. Click on it.
-
Choose "Sign out" to close the RDP session safely.
Connect To A Windows VPS Or RDP Server through Linux OS
If you're running a Linux OS and need to access a full Windows desktop or VPS through the Remote Desktop Protocol (RDP), fear not!
Follow these steps to connect effortlessly using Remmina, a powerful remote desktop client for Linux:
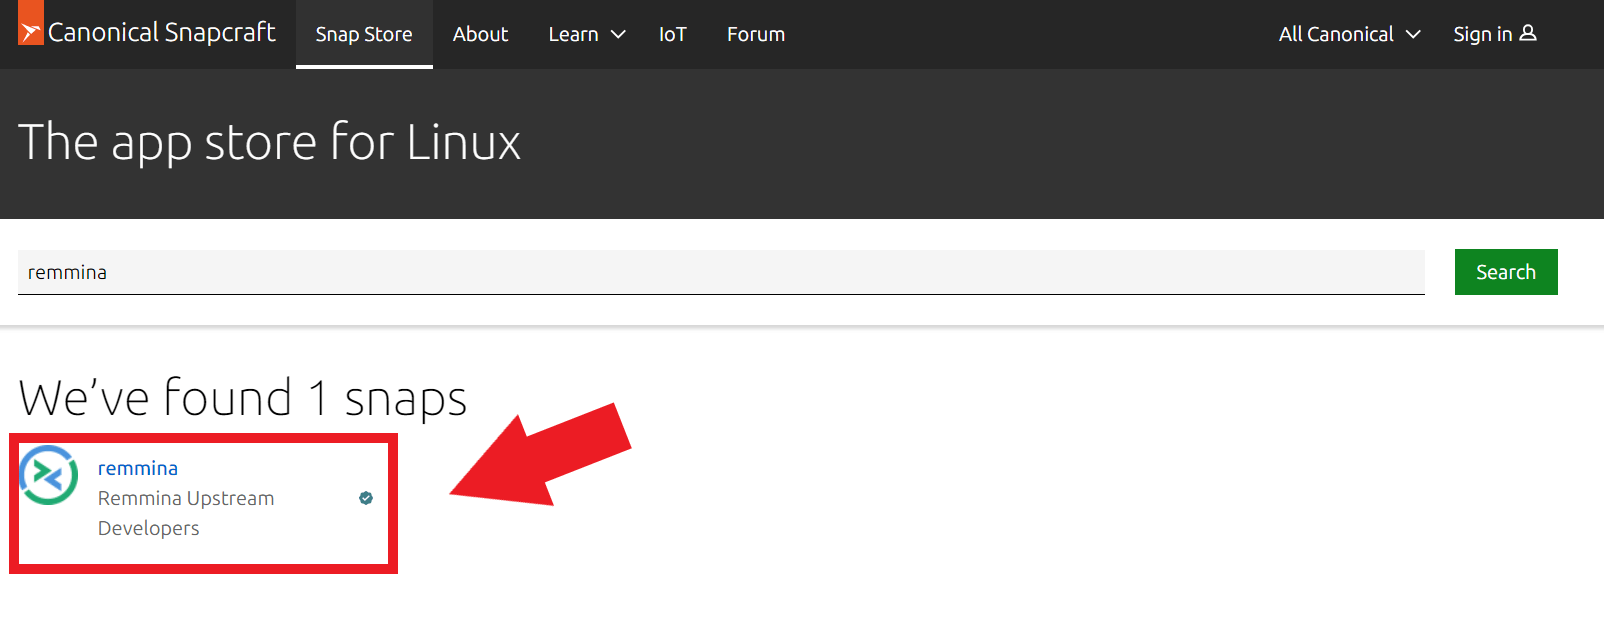
Step 1: Install Remmina
First, you'll need to install Remmina, the remote desktop client, from the Snap Store.
Here's how:
-
Open your Linux OS and click on the "Show Applications" button located at the bottom left corner of your screen.
-
Show Applications Button
-
Search for "Remmina" in the application list and click on the Remmina icon to launch the remote desktop client.
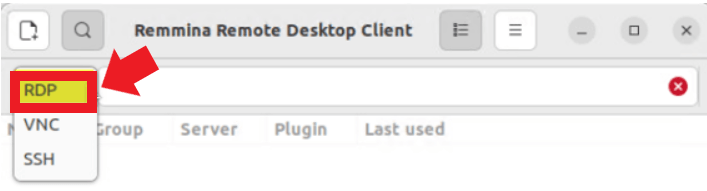
Step 2: Create a New Connection Profile
Once Remmina is open, you can proceed to create a new connection profile to connect to your Windows VPS:
-
Click the plus sign (+) icon in Remmina to initiate a new connection profile.
-
In the new window, select "RDP" as the connection type.
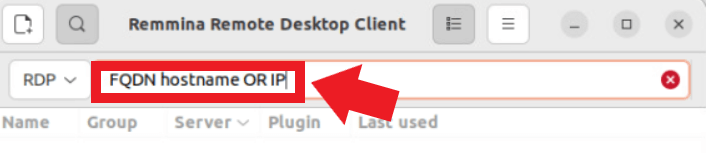
Step 3: Input the VPS Hostname or IP Address
-
Now, you need to provide the necessary details to connect to your Windows VPS:
-
In the "Server" field, enter the VPS hostname or IP address of the server you want to access.
-
Press Enter to proceed.
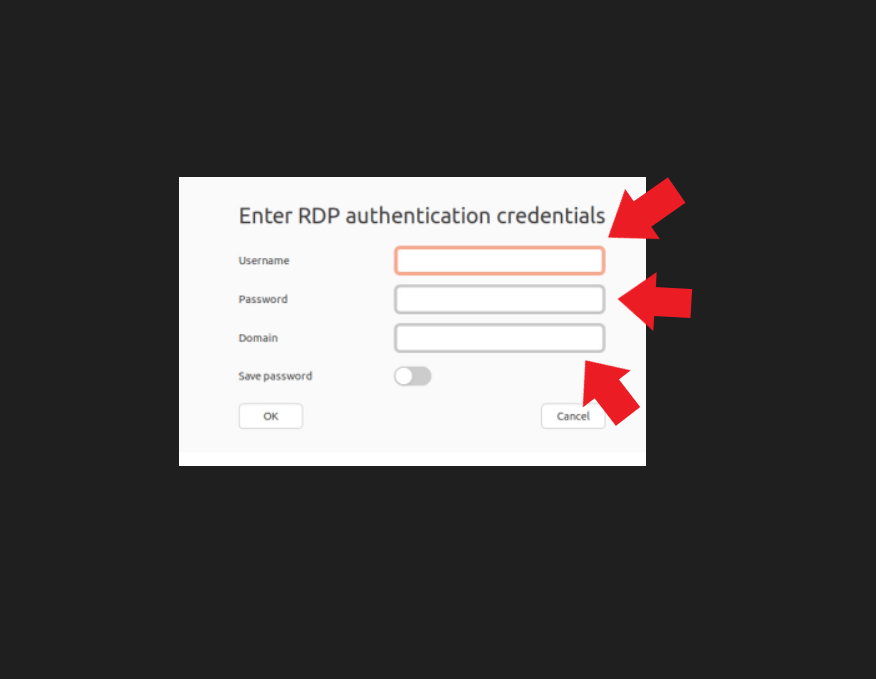
Step 4: Authenticate with Your VPS Credentials
Upon pressing Enter, you'll be prompted to enter details of the VPS username and password, details which you should have received in the welcome email:
-
Input the provided VPS username and password in the authentication window.
-
Click OK to proceed.
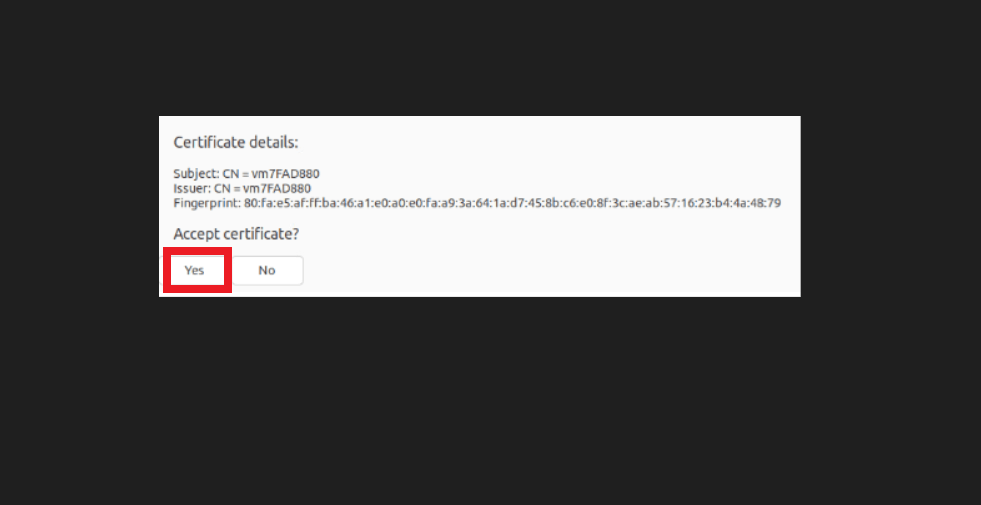
Step 5: Handling Certificate Warning
As this might be your first login, you might receive a warning regarding the certificate:
-
If you see a certificate warning, click Yes to proceed. This warning is normal and happens when connecting for the first time.
-
Remmina will save the certificate data for future connections, making subsequent logins smoother.
How to Login to Windows VPS from macOS
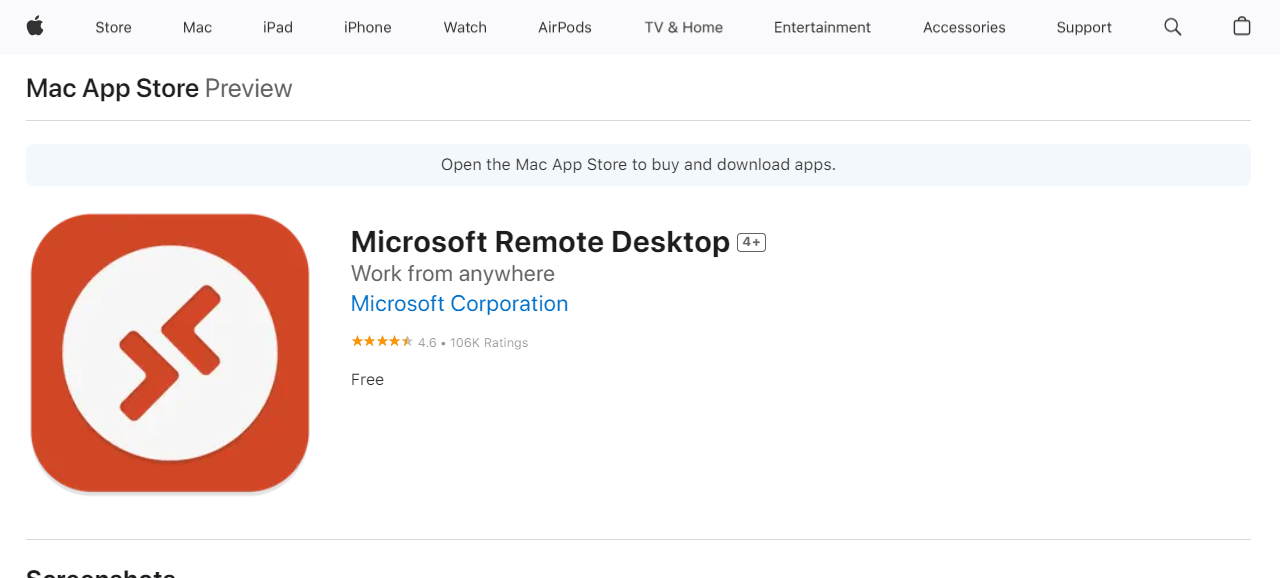
If you're using macOS and need to access your Windows VPS, you can easily do so by using the Microsoft Remote Desktop (MRD) application, available on the App Store. Follow the steps below to connect to your Windows VPS from your Mac:
-
Download and Install Microsoft Remote Desktop (MRD):
Go to the App Store on your Mac, search for "Microsoft Remote Desktop," and install the application.
-
Launch Microsoft Remote Desktop:
Once installed, open the MRD application on your Mac.
-
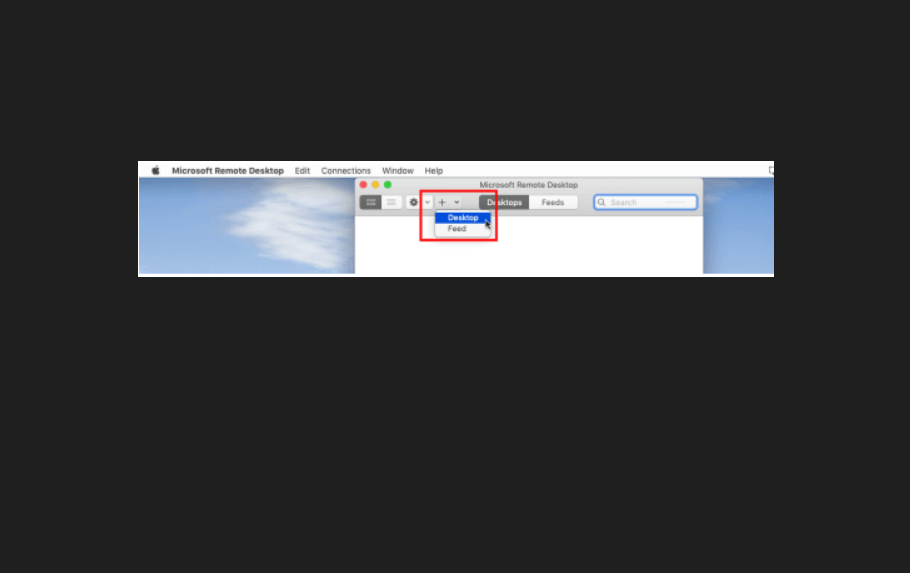
Start a New Remote Desktop Connection:
On the following screen, click the "+" (plus) icon in the top-left corner of the MRD window, and select "Desktop" to connect or create a new remote desktop connection.
-
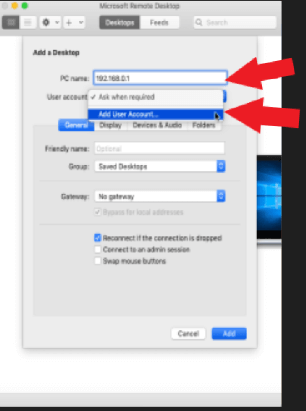
Enter PC Name or Server IP Address:
In the new connection window, enter the PC name or the server IP address of the remote server of your Windows VPS.
-
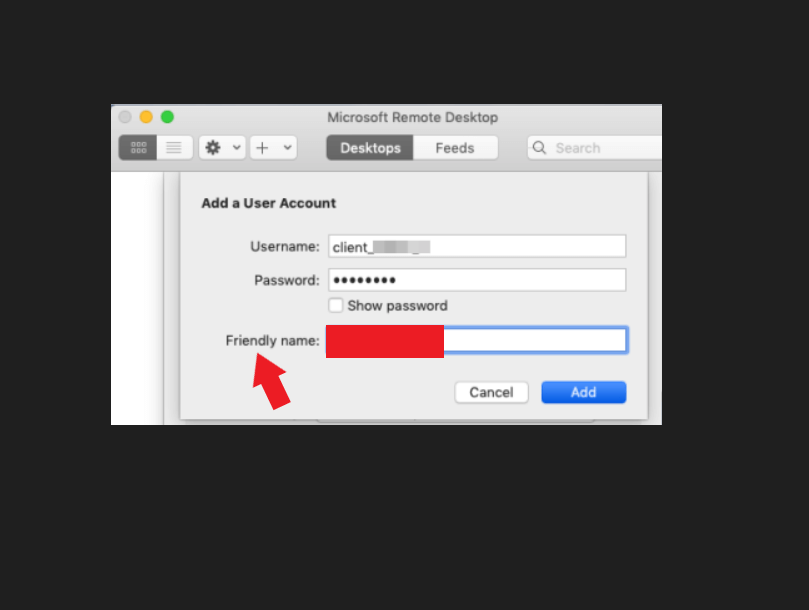
Add User Account:
Click the "Add User Account" in the user account drop-down menu. Input your VPS username and administrator password (sent to you via email). Set the username administrator password as "Administrator" or any other name for easy identification.
-
Save and Complete the Connection:
Leave other settings at their default values and click "Add." You will now see your new remote connection listed in MRD.
-
Start the Connection:
Click the "Start" button to initiate the connection to your own Windows system and VPS. MRD will automatically start menu configure your windows system and Mac OS remote desktop for the VPS.
-
Access Your Windows VPS:
You can now access your own Windows VPS login from anytime you open the MRD application. Simply select the remote connection you just created to log in to your Windows VPS.
Alternative Windows RDP Clients
Apart from remote connections from Microsoft Remote Desktop, you can also connect to your Windows VPS from macOS using other RDP clients, such as:
PuTTY:
A free software application for Windows OS, which can be used to create a secure shell (SSH) connection from the remote server to your local system or VPS or dedicated server hosting it.

2X RDP Client:
Another option for establishing a remote desktop connection to your own Windows desktop or VPS from macOS.
With these easy steps and multiple RDP client options, you can seamlessly log in to your own Windows server or VPS hosting even from your macOS device and manage your server efficiently.
Frequently Asked Questions
What is a VPS?
A VPS, which stands for Virtual Private Server, is a server running within a physical server, providing a cost-effective and flexible hosting solution. It acts as an in-between option, offering greater control, resources, and customization compared to shared hosting servers, while being more affordable than a dedicated server.
How can I connect to and manage my VPS?
You can conveniently connect to and manage your own VPS hosting or servers using a Secure Shell (SSH) from any computer operating system. SSH allows you to establish a secure and encrypted connection between your local machine and the VPS, granting you remote access and full control over the server. By using SSH, you can execute commands, log in, transfer files, and perform various administrative tasks on your VPS, ensuring a seamless hosting experience.
What is SSH?
Secure Shell (SSH) is a network communication protocol that enables secure communication and data sharing between two computers over an open network.
It provides both public key authentication and strong password authentication, ensuring secure and encrypted communication between the two operating systems together.
What are the requirements for using SSH to log in to your VPS?
To use SSH for VPS login, ensure you have the following:
The remote computer (VPS) is on and connected to the local system of the network.
The IP address of the remote machine you want to connect to.
Access permission to the remote VPS.
SSH access granted for your VPS account.
Firewall settings allowing remote SSH connections.
Your IP address added to the firewall's allowed list.
SSH login details from the VPS dashboard (SSH username and password).
For Windows users, an SSH client or server with OpenSSH installed and enabled.
Meeting these requirements ensures a secure and efficient SSH login to your VPS hosting., enabling smooth management and interaction with your server.
How many RDP connections does an RDP Server support?
By default, an RDP server supports two per RDP server connections. However, with the purchase of a Windows Server 2019 Remote Desktop Services (RDS) license, you can expand the number of user connections to up to 10 on your Windows Server 2019, enabling multiple users to access and utilize the server simultaneously.
 (1).png)
Ozair is a Cyber Security professional hailing from Islamabad, Pakistan. He holds a bachelor's degree in Cyber Security and has been president of AUCSS (Air University Cyber Security Society) for 2021-22. Ozair's expertise lies in Technical content writing, Information Security, and Cyber Security. As the founder of CySecOps, a Cybersecurity company that specializes in SaaS & E-commerce digital security, Ozair is passionate about ensuring the safety of businesses online. Alongside his exceptional team building and leadership skills, Ozair is an analytical, observant & critical thinker. Stay up-to-date with Ozair's work by following him on Twitter @OzairMalik13, LinkedIn, or visiting his website at Cysecops.co.

.png)