There are several reasons why Mac hosts file is essential. Yet, it is crucial to override a Domain Name System and to map a new IP or Internet Protocol address. In this case, knowing how to access and locate this File is elementary.
It is painless and somewhat quicker to perform this task. You must know what commands are required to run the host database and which applications should be used. Users can then safely update and edit the host file to resolve domain names to IPs on the Macbook hosts file.
-
- The Domain Name System
- Hosts File
- How to find your website's IP address?
- How to Edit the Hosts File in Windows 8, 10, and 11?
- How to edit the host's File on any mac OS version?
- Test Changes to the Hosts File
- Ways to Preview the Website
- How to Generate a Temporary URL with SkipDNS?
- Ways to Edit Host Files in Windows 10
If a user is selecting another device or a whole new server or web server that will be connected to the internet and if you are having trouble with malicious websites, there is an invisible file on your mac or windows ten that can help. This is the mac file, and in this blog, we will discuss important points to know about the mac hosts files in mac and windows 10.
The computer uses it to resolve or do a DNS lookup for IP addresses. It can also push your computer to fix a website to a precise address instead of resolving your website using the DNS located in the name servers.
The Domain Name System
When a user enters a domain name he wants to visit, many things happen behind the scenes. Each service, website, or device linked to the internet contains a unique numeric address that shows its location - called IP/TCP address. The DNS or Domain Name System decodes those numeric addresses which are readable by humans.
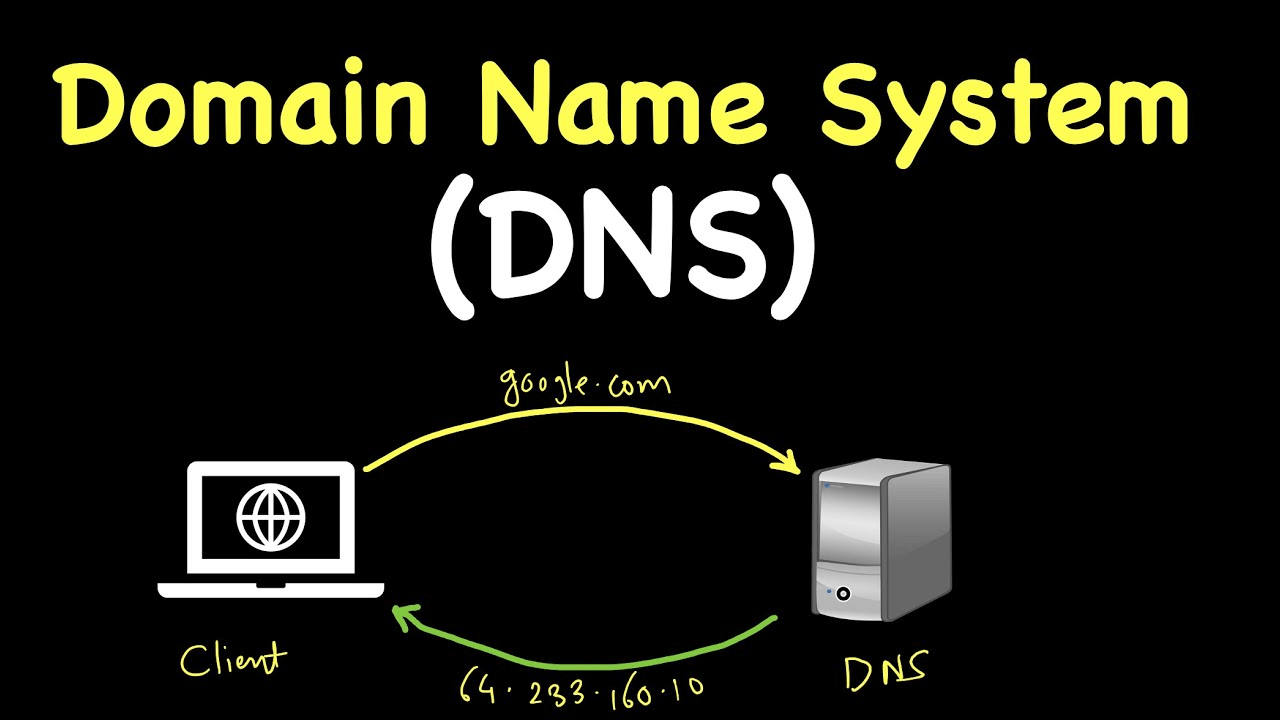
You mac device pings a DNS new server when firstly a user types in a web address. Typically it is automatically configured by the Internet Service Provider. You mac device then builds up a confidential cache file to memorize those details when the user reviews the same site.
Hosts File
The DNS or domain name system is mac’s standard way to know how to reach where it is running on the internet. Another helpful way can be used to edit the host's file override the default DNS information.Mac users can edit using it with any text editor as long as he has root user privileges.

How to find your website's IP address?
The mac host file is commonly used to enforce the link between a website and domain name pointed by DNS records to the other address. The user must start it by acquiring the website’s address.
Usually found in the system's control panel. For SiteGround users, this address can be found on the website’s Site Tools > Dashboard > IP and Name Servers > Site IP.
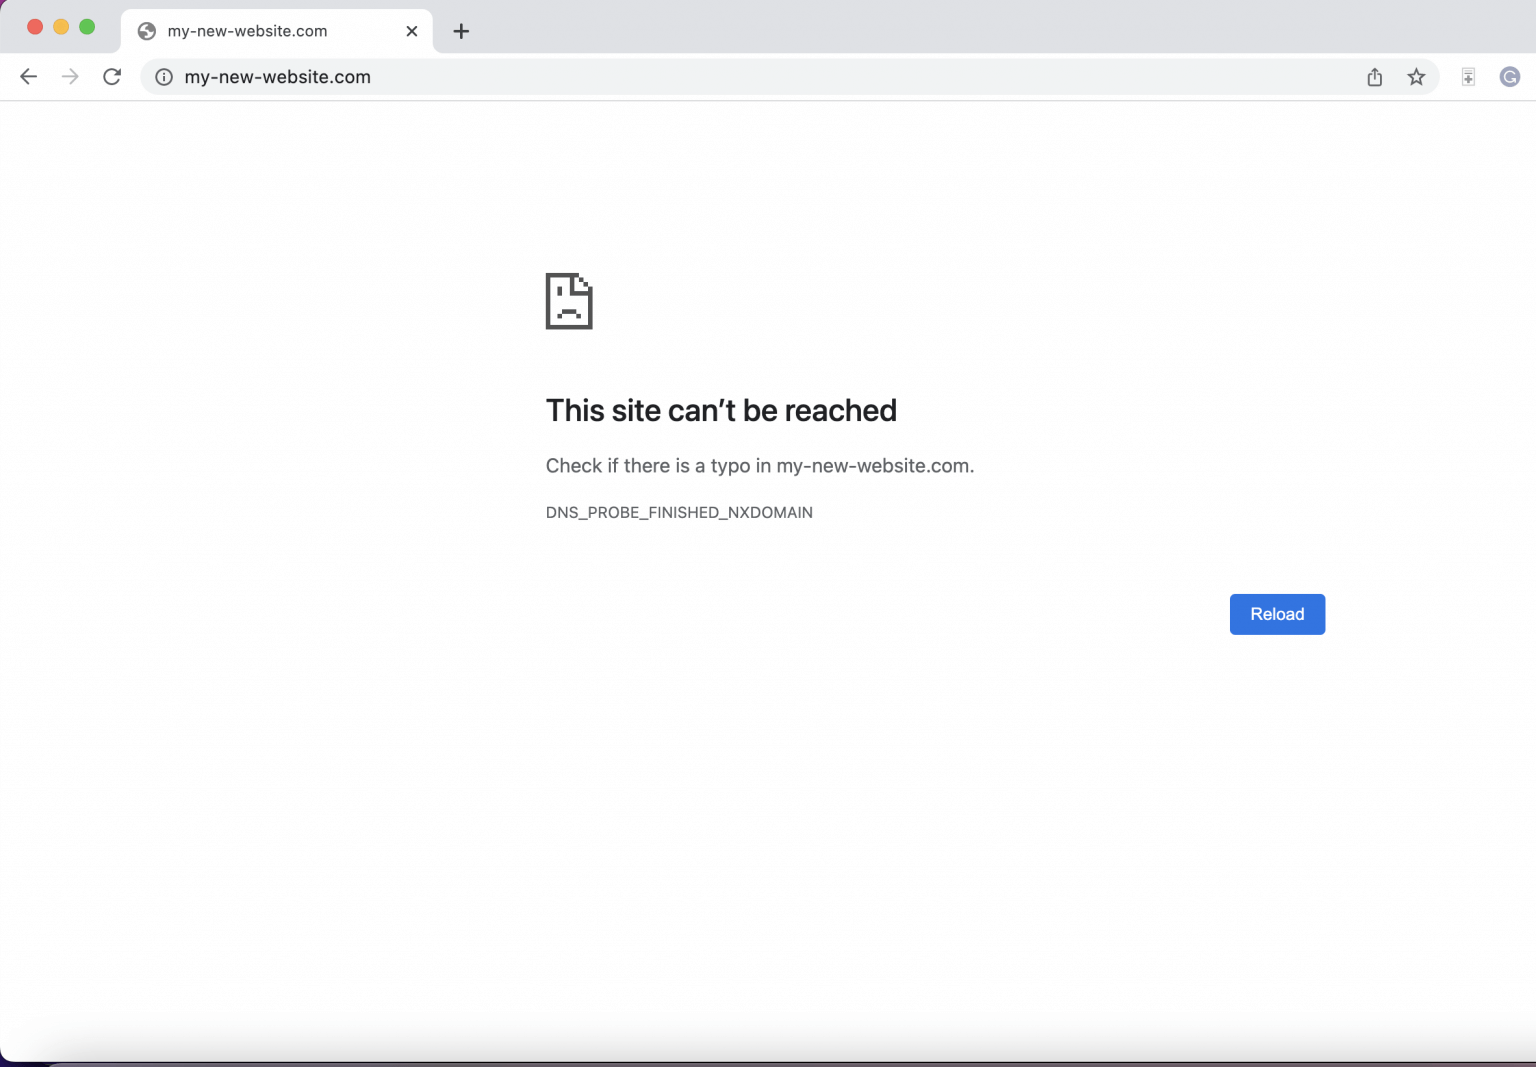
To describe more descriptively, we have assumed created a website as my-new-website.com. This domain name is non-existent, is not registered, and has no DNS records. A visitor trying to open this site will see the “This Site Can’t be Reached” error.
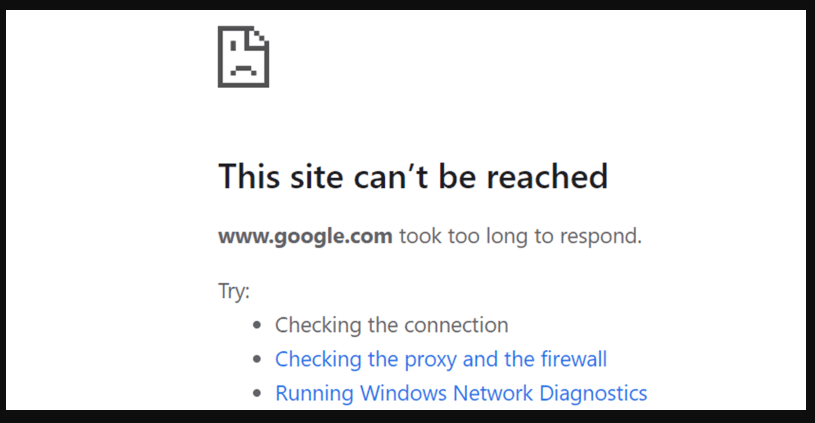
In this scenario, the IP address must be used in the host's File while mapping “my-new-website.com” to the website. Users can easily preview this website on the local network by editing the mac hosts file.
Likewise, users can build a new website, name the site beside a domain name by DNS and map the domain with a host file.
How to Edit the Hosts File in Windows 8, 10, and 11?
Editing the host's File on various window systems is almost the same. All you have to do is to edit the File with notepad. From Windows 7, the user must run notepad as an administrator password, whereas in older versions of windows like XP, etc., this step is not compulsory. Editing the host's File also helps you to check your new site content during the propagation time frame after it connects to a domain for web hosting. When the propagation is over, the user must remove the new lines. Users can flush the DNS cache to speed up the procedure by executing specific commands to flush a mac’s DNS cache.
Yet, regardless of the Windows performance, the default Windows site is similar unless you installed the OS in a diverse partition:
C:\Windows\System32\drivers\etc\hosts
Step 1 - Open Notepad
In this direction, we will edit on Windows 10. Click on the start menu or open the Windows menu.
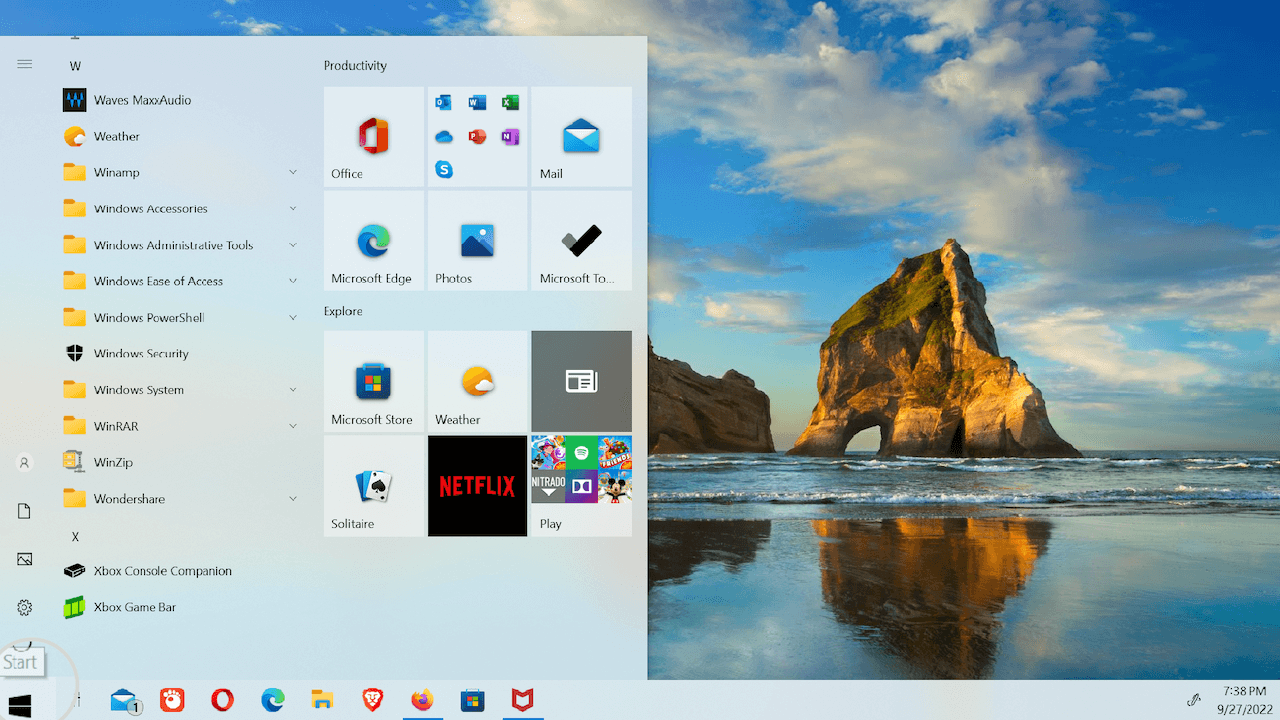
Typing the notepad command will automatically enable the search information. The first result will be shown as a notepad. Right-click on the notepad icon and run as administrator.
Step 2 - Open the Hosts File in Notepad
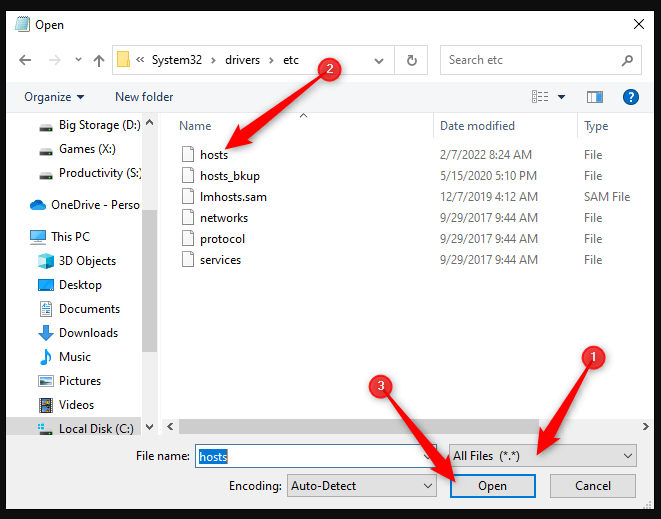
Click on the 'File' menu and double click terminal, then on 'Open'. It will take you to a file selector box.
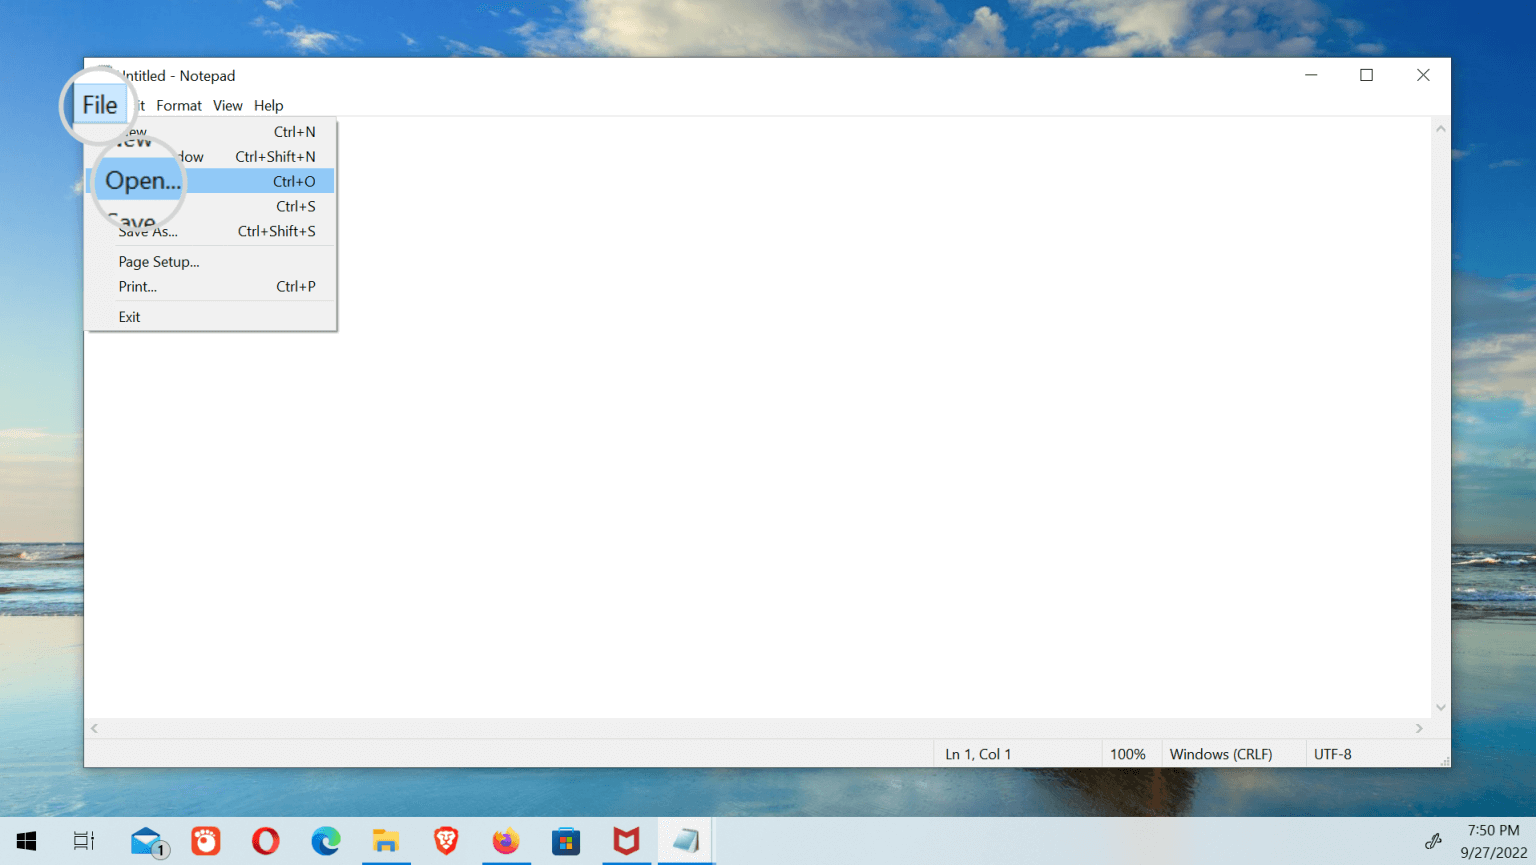
Make sure to select the 'All Files' option. Alternatively, the host's File will not be shown in the dialogue box as it is a hidden file with no .txt extension. Select the 'file' option and then click 'open'.
Step 3 - Edit the Hosts File
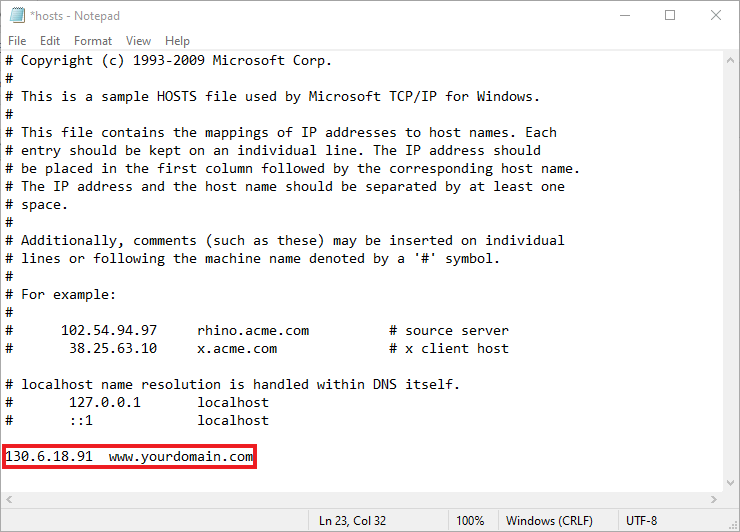
Windows 10 is closer to any other Operating system. It carries a few lines that define the IP for the local network, hosts, and other services. Users need to note that those files are commented with the symbol ‘#’, which means that they are left as examples and are not enabled.
Write a new line to add a custom hostname setting at the bottom of the File while omitting the symbol ‘#’.
The entry should be in the following format as below:
IP_address yourdomain.com www.yourdomain.com
Substitute ‘The IP with the original IP of the website and the domain you are mapping to the IP, i.e., “yourdomain.com”.
The user must connect the non-existing domain “my-new-website.com” to IP 35.214.215.226. The line will read as follows:
35.214.215.226 my-new-website.com www.my-new-website.com
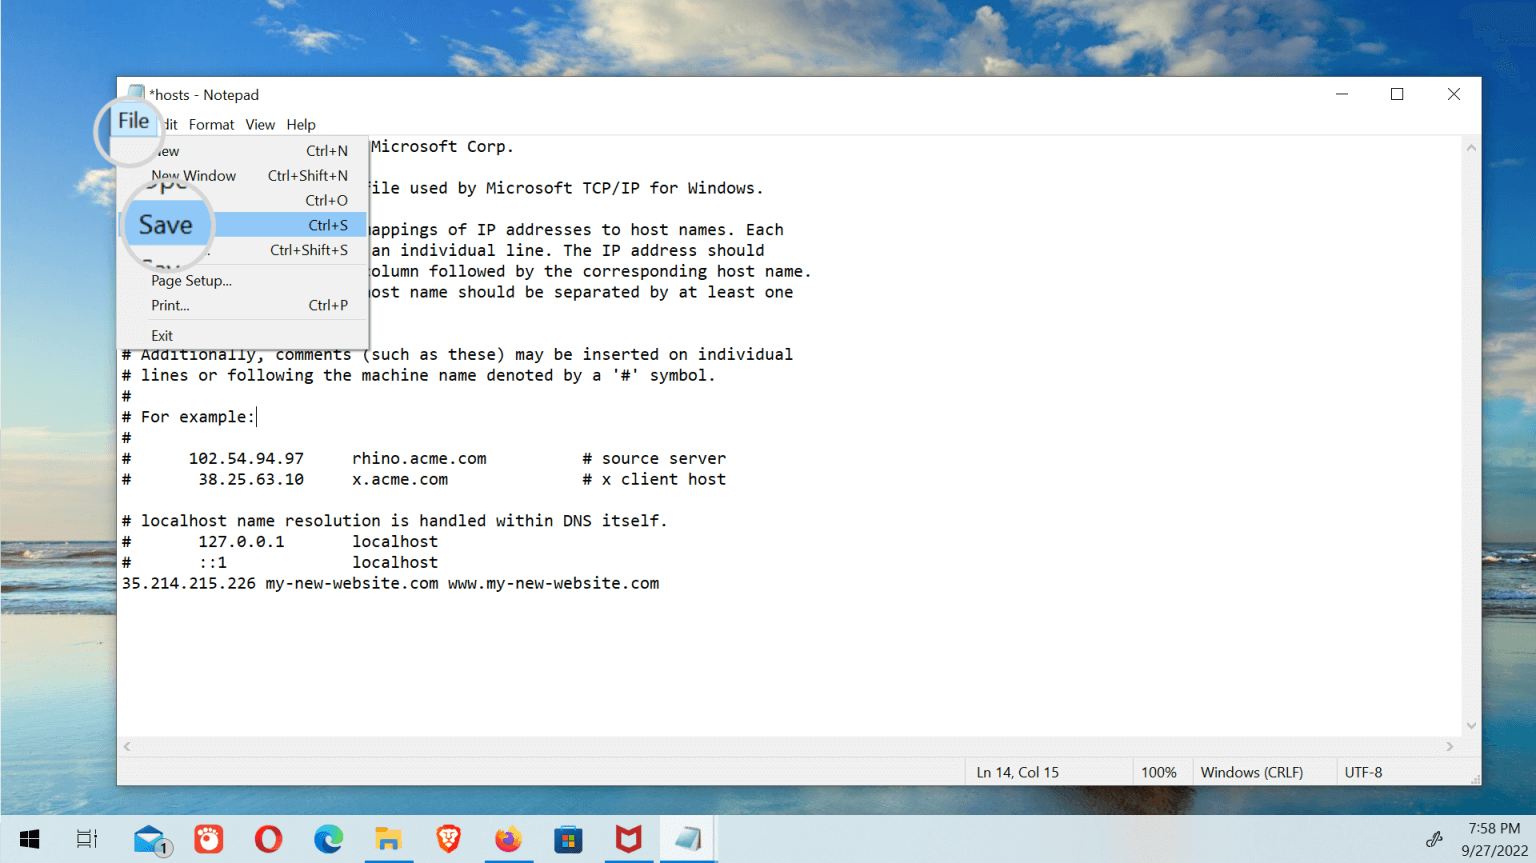
Save the File to keep the new changes with the shortcut on the keyboard “Ctrl + S” or from File> Save.
How to edit the host's File on any mac OS version?
A Macbook with a mac host file is less prioritized but is a critical text document that can map the hostname to specified IP addresses. While the modern Internet operates an assortment of private and public DNS servers to map IP addresses, the host's File is a convenient way to override DNS servers, authorizing the user to manually point a website address to the chosen IP address or block access to a site entirely by suggesting to a new or internal IP address on the mac hosts file.
Step 1 - Open Terminal on mac OS
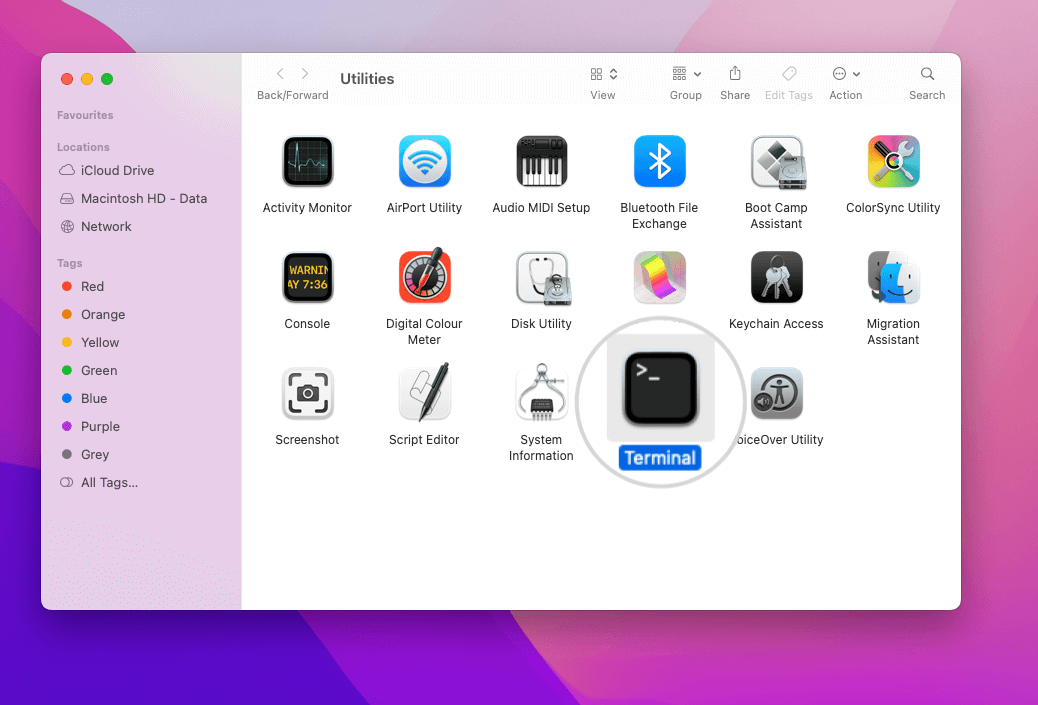
The user must operate the complete terminal application to edit the mac's host file. To open it, steer to Finder > Go > Utilities.

Open the menu "Utility", where users can access tools for the mac hosts File. Find the terminal application and double-click the terminal icon.
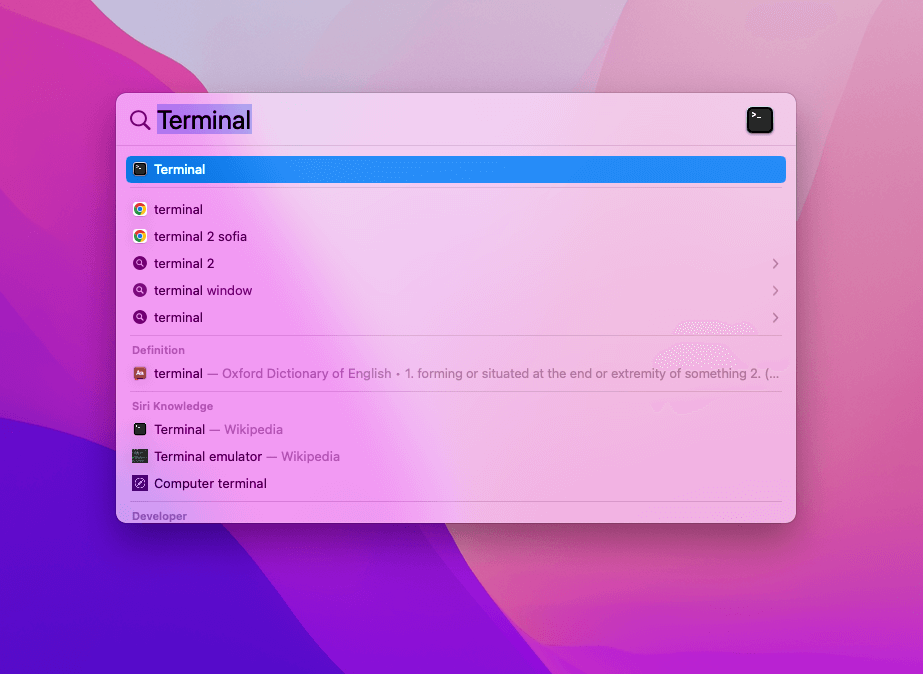
On the other hand, the user can open a terminal window by carrying the Spotlight Search bar by pressing the shortcut key Command + Space. Then type terminal in the pop-up window and press enter.
Step 2 - Open the mac hosts File in Terminal
Open the terminal window of the mac's host file and edit the File with one of the available text editors.
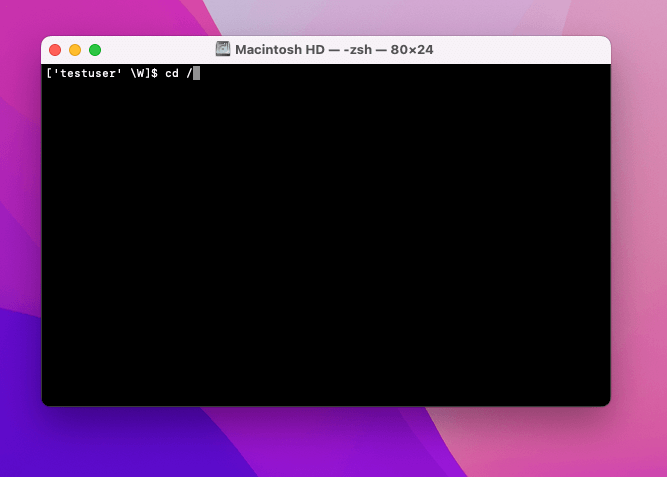
on the very first hand, the user needs to make sure that he or should be located in the mac's top-level folder by typing the following command:
cd /
To confirm the command, press enter. It will take you to your Macintosh HD main folder
The location on the local machine is:
/private/etc/hosts
Extract from the Finder window onto your desktop. Extend the Hosts file. It should open 'TextEdit by default'. Delete the content in the Hosts file and paste the following into the same File:
### Host Database##
When the system is in boot mode, the local host is operated to configure the loopback interface#.
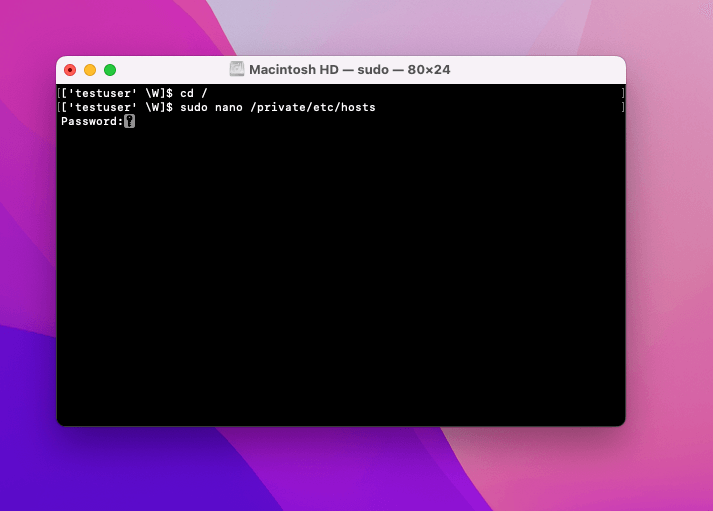
In this blog, we are using a Nano text editor or Nano editor to be able to begin editing. The user is required to have administrator privileges. The nano text editor command line to open the File will be sudo nano etc. hosts, and it will be written as:
sudo nano /private/etc/hosts
Once the command is confirmed with enter, the user must provide an administrator password. Enter the admin password and confirm it by pressing enter.
Step 3 - Edit in Terminal
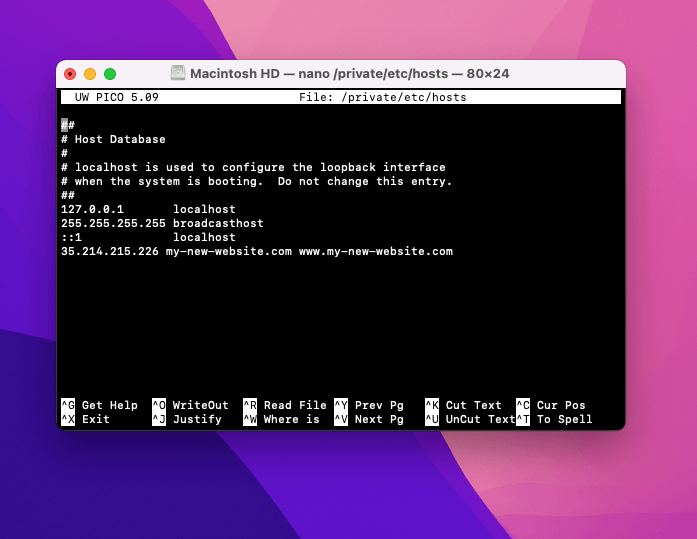
Here you can add your custom hostname settings. By default, the File only incorporates an occasional line clarifying the broadcast host and local host address.
You can add a new entry here by using the arrow keys to go to the last line. Use the following command to point a domain to a new development server name.
IP_address yourdomain.com www.yourdomain.com
The user must replace the IP address with the website's IP address, i.e., yourdomain.com, with the original host's File and the actual domain name.
In this blog, we use the non-existing domain my-new-website.com, which is not documented and does not have an active DNS cache.
The new website for "my-new-website.com" is hosted under the IP address mentioned earlier.
To force a system to open this website from the same domain name, the user should add the following line in the host's File:
35.214.215.226 my-new-website.com www.my-new-website.com
When the user has finalized adding the new settings, press Control + O (WriteOut) to ensure and hit Enter. Eventually, you can press Control + X to leave the terminal application and Nano Text editor to reopen the terminal application. In the Terminal application, type sudo killall hup mdnsresponder as:
sudo killall -HUP mDNSResponder
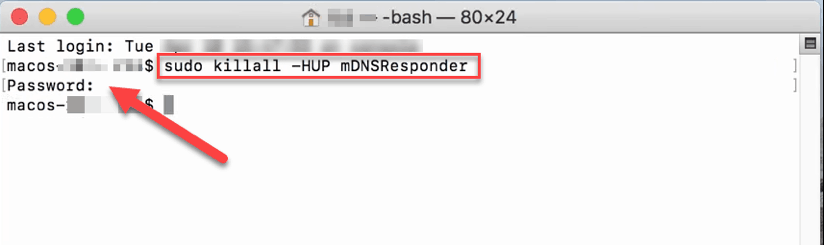
This command is followed by pressing Return to clear your Mac's DNS cache and prevent any clashes between DNS and the Hosts file. The changes should take effect immediately.
Test Changes to the Hosts File
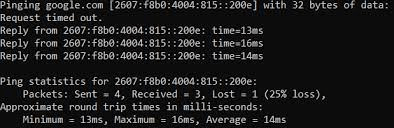
When the user has added the settings of the hostname, testing the changes can be performed by any browser. If the changes affect the performance, the hostname will resolve from the specified IP address.
The quoted example used in this blog as a test site is an unregistered domain. This is a non-existent domain that has no DNS zone. When the user has opened the website, and changes have not taken effect, the user will see 'DNS_PROBE_FINISHED_NXDOMAIN', a typical error message for the domain not registered.
Regardless, the website will be opened if the hostname is pointed correctly to an IP address where a new website is installed.
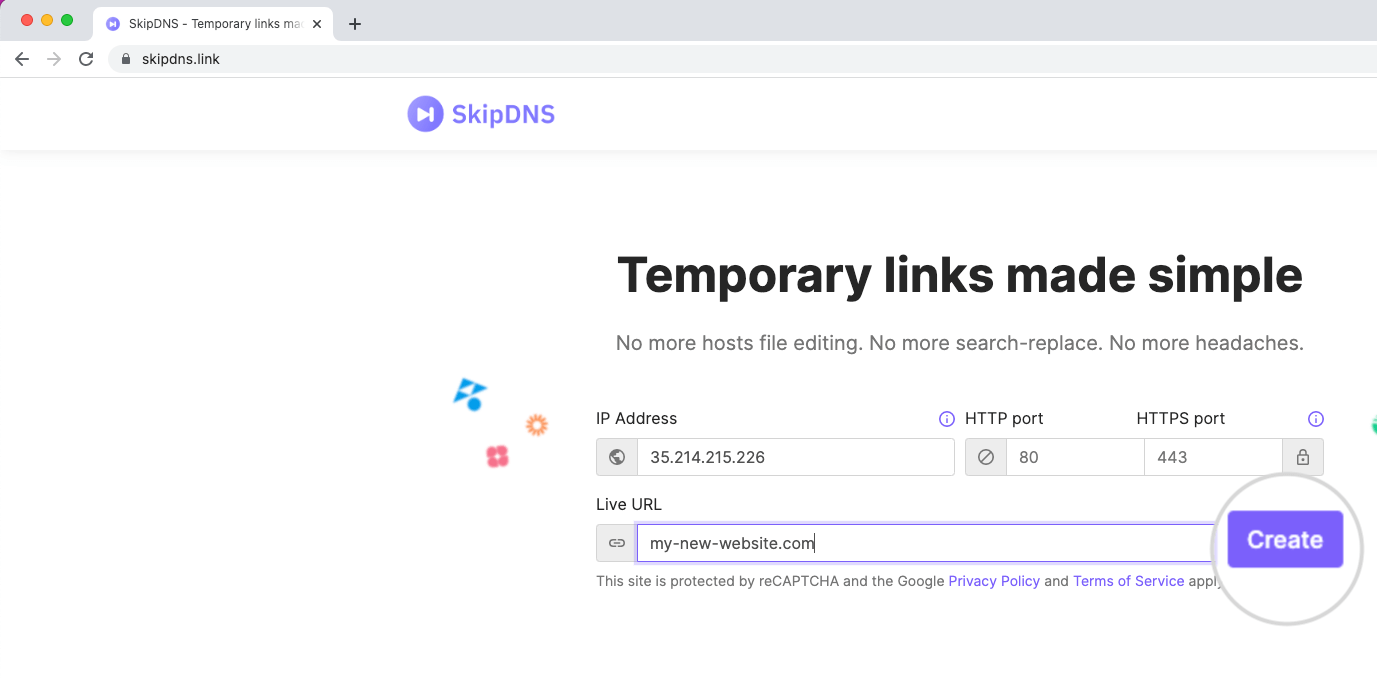
After providing the details, use the ‘create’ button to generate a temporary URL. A user will be asked to agree to SkipDNS’s terms and conditions on the subsequent page. Then, the user will see a temporary URL generated by SkipDNS to open the hostname from the specified IP.
The user can use this URL in any computer or browser to open the website, but this link will be valid for a limited period.
Ways to Preview the Website
To preview websites, host files are the most stable and reliable way. Although there are other ways a user has if he finds editing the host's File hard. These alternatives have specific weaknesses and strengths that are not handled easily and are unsuitable for every case.

How to Generate a Temporary URL with SkipDNS?
Using a temporary URL is a popular method of previewing a website. Rather than modifying the host's File, some websites can generate a temporary URL that any computer can use.
This strategy is suitable for previewing an existing file or website. Building or editing a website using a temporary URL is not suggested, as most website applications are domain dependent, and the fresh content might be recorded through a temporary URL.
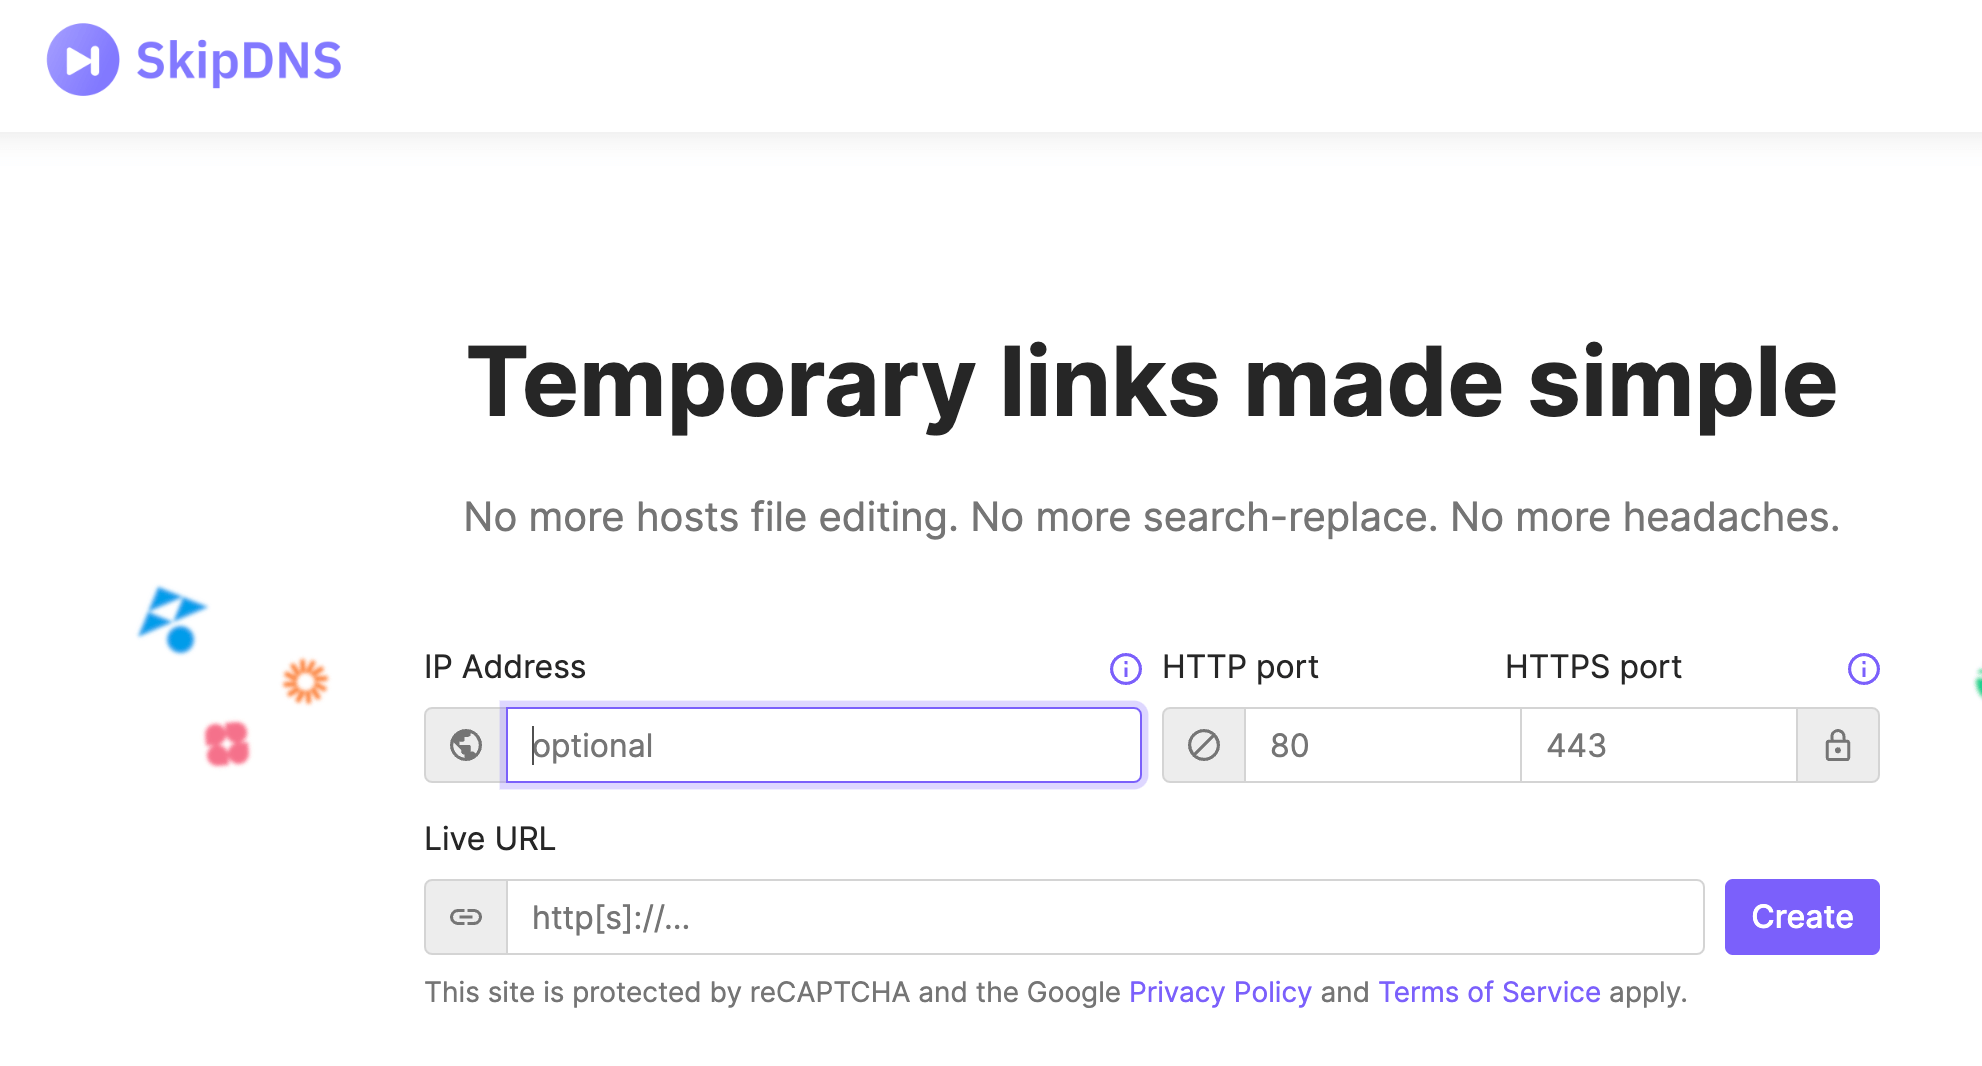
SkipDNS is one of the popular websites that can generate this type of URL.
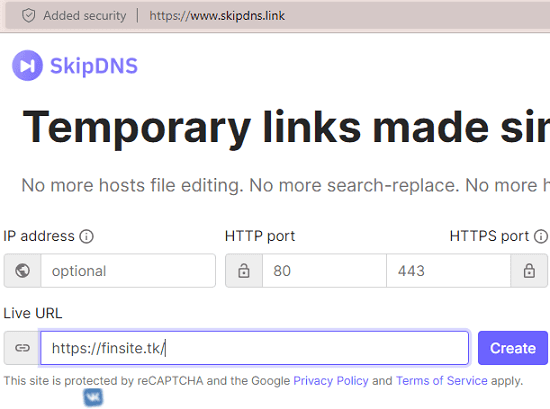
The user is required to provide the website’s IP address in the given field and type the hostname in the field Live URL.
Ways to Edit Host Files in Windows 10

DNS, or Domain Name System, is the phonebook of the internet. Yet, the host file on the computer can also be used as a guide for domain names.
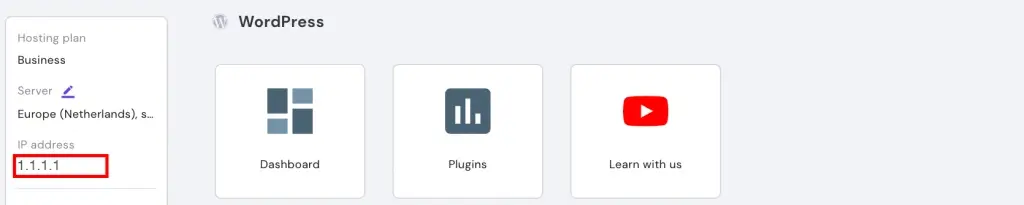
Before it all starts, you must have an IP address for your domain.
The first step is to log in to the panel on the left sidebar and see the hosting plan, server, and IP address details.
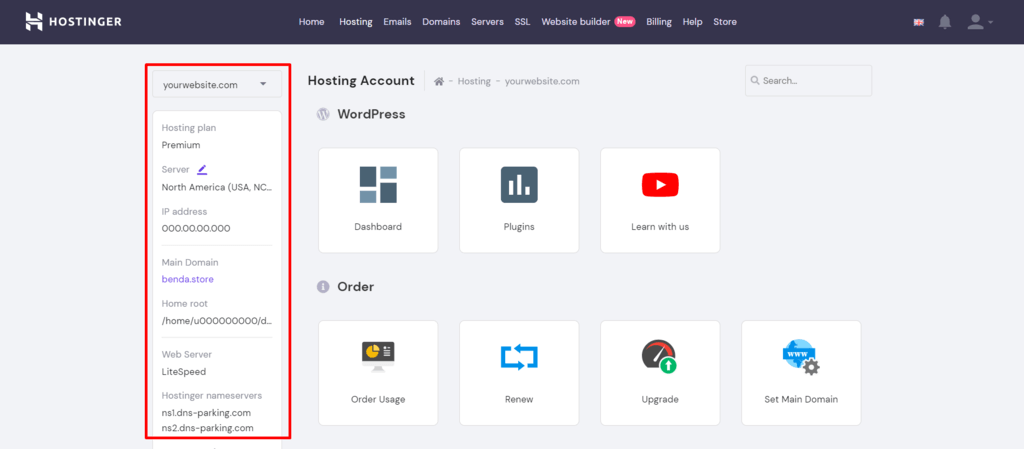
Copy the IP address of the server:
There are two ways for windows 10 to edit the host's File:
-
Change the File manually
-
using the host's file editor tool.
Change the File Manually
-
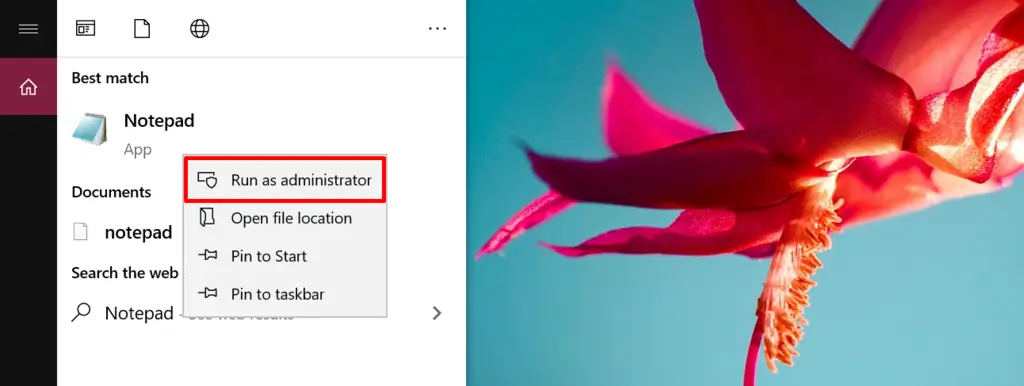
Click the Start button and open Notepad. Right-click to Run as administrator.
-
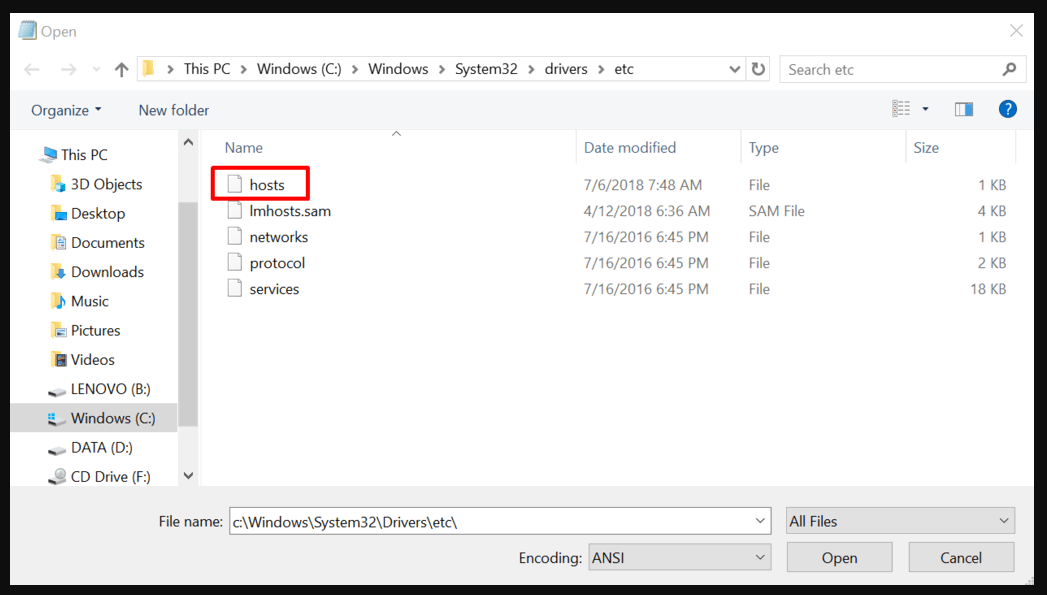
Open the Notepad and go to File> Open. Then go to C:\Windows\System32\Drivers\etc and select All Files to locate the host file.
![Select All Files to locate the host file]()
-
There you go; you can now edit the host's File. Enter the custom IP address you created before, separate it by a space, and then add your domain name.
![Enter the custom IP address you created before]()
-
Save your changes when you are done.
Using Hosts File Editor Tool
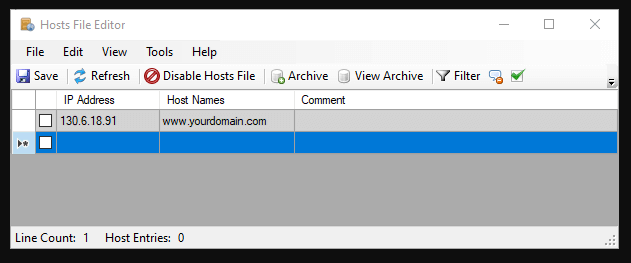
in windows 10, an easier way to edit the host's File is by using the host's file editor.
-
Type your targeted IP address once you are in the Hosts File Editor, and Type the domain name under their respective columns.
-
Save the changes you made when you are done.
![Type your targeted IP address once you are in the Hosts File Editor]()
In this blog, you have got to learn how to edit the host's File on different operating systems. Make sure that you have administrative rights before you start editing the host's file too. However, it will only affect the computer that holds the host's File.
As a user, you must use a text editor like notepad to make changes in the file, host file, or nano text editor. In Mac, the user is required to resort to editing the host's file or nano text editor through the terminal.
Frequently Asked Questions
What is the host's File, and why must I edit it?
The host file is a plain text file that maps domain names to IP addresses. Editing the host's File can be helpful if you want to block access to a website that is blocked or if you want to redirect a domain name to a different IP address.
How do I find the host file on Windows 10?
On Windows 10, the host file is located at "C:\Windows\System32\drivers\etc\hosts". You can open it using a text editor like Notepad or Notepad++.
How do I find the host's File on macOS?
On macOS, the host file is located at "/private/etc/hosts". You can open it using a text editor like TextEdit or Sublime Text.
Can I edit the host's File without administrator/root privileges?
No, in most cases, you will need administrator/root privileges to edit the host's File. On Windows 10, you can right-click the text editor and choose "Run as administrator". On macOS, you can use the "sudo" command in the terminal to edit the host's File as the root user.
How do I add an entry to the host's File?
To add an entry to the host's file, open the host's File in a text editor, add a new line with the IP address and domain name, and save the File. For example, to map "example.com" to the IP address "192.168.0.1", you would add the following line to the host's file: "192.168.0.1 example.com".
How do I remove an entry from the host's file?
To remove an entry from the host's file, delete the line corresponding to the domain name you want to remove and save the File.

Bilal Mohammed is a SOC analyst and cybersecurity expert who is passionate about making the internet safer. He has expertise in penetration testing, networking, network security, web development, and security operations center (SOC) services. In his spare time, he looks for security and design vulnerabilities to protect against attacks from hackers.


 (1).png)
![Best Text-to-Speech Websites in 2024 [Your Complete TTS Guide]](/static_content/vpsserver_com_frontend/img/text to speech.png)