


Installing and Securing phpMyAdmin on Ubuntu 16.04 server
Overview
What is phpMyAdmin?
phpMyAdmin is an web-based tool for MySQL or MariaDB written in php. It is intended to perform various task such as creating, editing, deleting and updating a database easily using a graphical interface which is in contrast to a cli based database system.
In this guide I will show you how you can setup and fine-tune phpMyAdmin for security on an Ubuntu 16.04 server.
Note: The following guide offers only basic security measures and does not guarantee a foolproof security method for your application, server or network. Always be careful!
Prerequisites
- A vps server from vpsserver.com, you can order one at https://www.vpsserver.com/plans/.
- An ssh client such as Bitvise[1] or Putty[2].
- Knowledge in linux command line is an advantage.
- We will assume that you already have installed LAMP on your server. If not, please follow the guide on installing LAMP server using Ubuntu[3].
Installing phpMyAdmin
Let us start by installing phpMyAdmin from our default Ubuntu repo. We can do the following steps by updating our local packages first using apt and then installing phpMyAdmin afterwards.
apt-get update
apt-get install phpmyadmin php-mbstring php-gettext
You will be asked a few questions to finalize your installation correctly.
 1. For the server, please select **Apache 2**.
 2. Select **yes** when asked whether to use *dbconfig-common*.
 3. Enter your own database administrators password on the next step.
 4. Confirm your administrator password on the succeeding step and confirm a password for *phpMyAdmin* application itself.
Next, we will enable PHP mcrypt and mbstring extensions with the following commands:
sudo phpenmod mcrypt
sudo phpenmod mbstring
Next, we will need to restart apache for the server to recognize the changes.
sudo systemctl restart apache2
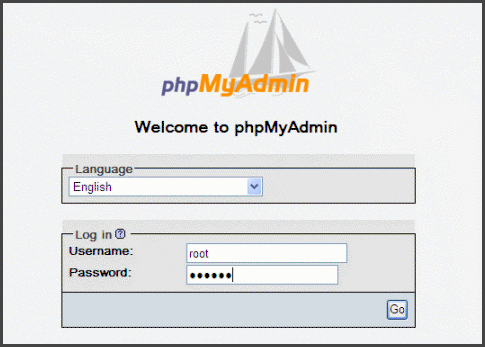
You can now access the phpMyAdmin web interface on the following web address:
http://<you_public_ip_or_domain_name>/phpMyAdmin
You can now login to the web interface using your root username and the password you configured earlier.
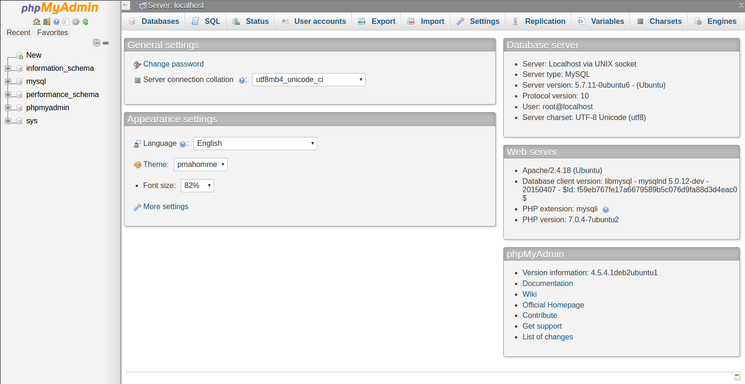
Upon logging-in, you will see the web interface of phpMyAdmin that will look like below:
Securing phpMyAdmin
Installing and running phpMyAdmin on Ubuntu server is fairly easy, we are able to finish installation in no time but we are not finished until we have secured phpMyAdmin from potential attackers. Since phpMyAdmin is an internet facing web interface, it has become one of the most attacked application ever owing to the fact that it is fairly easy to identify a phpMyAdmin server.
To secure phpMyAdmin we will have to devise some security measures to decrease the probability of attacks.
Enable apache to allow .htaccess override
To secure phpMyAdmin first we need to allow .htaccess file overrides by reconfiguring apache.
Let us edit the file phpMyAdmin.conf by following the command below:
sudo nano /etc/apache2/conf-available/phpMyAdmin.conf
Next, we will need to add an AllowOverride All directive to the file within the phpMyAdmin directory section.
<Directory /usr/share/phpMyAdmin>
    Options FollowSymLinks
    DirectoryIndex index.php
    AllowOverride All
    . . .
After adding the line, please save and close the file.
Restart apache to finalize the changes.
sudo systemctl restart apache2
Creating an .htaccess file
Since we have enabled .htaccess override in apache we will now need to create one to implement some security measures.
Let us create our .htaccess file within the application directory of phpMyAdmin by typing:
sudo nano /usr/share/phpMyAdmin/.htaccess
Let us open the file and enter the necessary code to secure our phpMyAdmin:
AuthType Basic
AuthName "Secure Server"
AuthUserFile /etc/phpMyAdmin/.htpasswd
Require valid-user
What are the parts of this commands:
AuthType Basic - means we will use a username password combination for this security.
AuthName - This sets a message in the login dialog box with a message "Secure Server".
AuthUserFile - the location of the .htpasswd file that contains the authorized username and password.
Require valid-user - Specifies that only authenticated user should be able to given access to the webpage.
After finishing, please save and close the file.
Create an .htpasswd file for security authentication
In the guide above we have determined the location of our .htpasswd file through our use of the AuthUserFile directive. But we will need an additional package to be able to complete the security procedure. Let us as apache2-utils from our default repository.
Apache2-utils enables an .htpasswd access and .htdigest authentication in apache as well as other useful tools for securing an apache server.
sudo apt-get install apache2-utils
After installation, let us now create our .htpasswd file.
The location that we selected for our .htpasswd file is at /etc/phpMyAdmin/. So we will create a file named .htpasswd in that particular directory as well as adding a user by following the below command:
sudo htpasswd -c /etc/phpMyAdmin/.htpasswd username
You will be asked to create a password for the particular user you have created.
once done and you want to create another user you can do so without using a -c flag like below:
sudo htpasswd /etc/phpMyAdmin/.htpasswd another_user
When you access your phpMyAdmin web address again, you will be prompted with a authentication login. Just enter the username and password you just configured and you are good to go.
Thats it. installation and basic security for phpMyAdmin is fairly easy to do, but never be contented with what you have, hackers are on the loose and their methods are constantly evolving. Futher security measures may be needed depending on the situation.
I hope you liked my tutorial, if you have any suggestions or comments please do not hesitate to write it below.
[1]: https://www.bitvise.com/ssh-client-download
[2]: http://www.putty.org/
[3]: https://www.vpsserver.com/community/tutorials/34/install-lamp-linux-apache-MySQL-server-and-php-on-an-ubuntu-14-04-64bit-vps-server/
Related Tutorials
Installing ServerPilot and Creating an App on Ubuntu 14.04 LTS 64bitInstall Percona Server 5.7 MySQL on Ubuntu, CentOS or Debian
How to install ISPConfig panel on a VPS - Alternative of cPanel - free cPanel
Installing NodeJS on an Ubuntu 16.04 VPS Server
Installing Redis with a Ubuntu 16.04 VPS Server
comments (1)
Drump
- 9 years agoUbuntu is little complicated but it is secure and easy to implement once you learn, Installing and securing phpmyadmin was the hardest task for me, but this tutorial helped me a lot. I have came to across to install joomla on Ubuntu by following <a href="https://hostpresto.com/community/tutorials/how-to-install-joomla-on-ubuntu-16-04/">Joomla on Ubuntu</a>. Do you think I should keep following them?