


How to install SSL certificate on Vesta CP VPS Hosting
Unlike installing an SSL certificate on Apache or Nginx, getting a certificate working on Vesta CP is pretty easy.
So you have Vesta Control Panel set up and you want to secure your domain with a certificate. Follow our instructions, let's start!
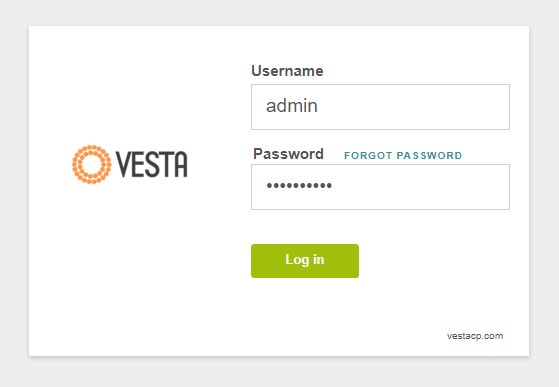
First step: login to your Vesta CP admin panel
Just navigate to https://yourdomain.com:8083, enter your login details and log into Vesta CP.
Second step: edit the domain settings
Hover over your domain name and select "Edit" option.

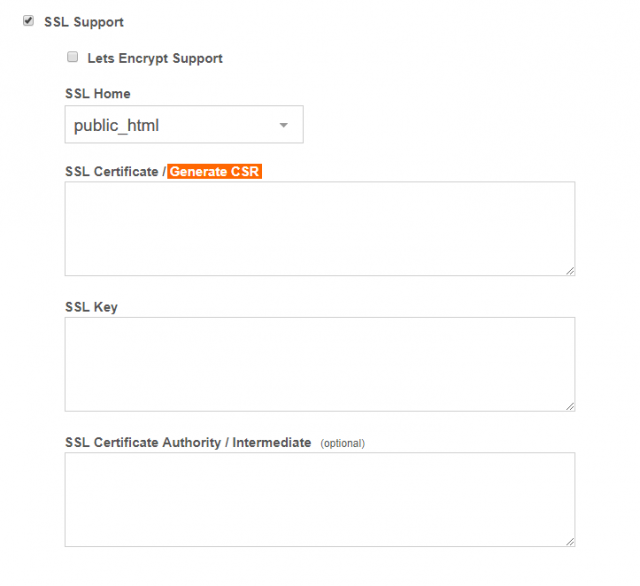
Third step: enable "SSL Support" and generate CSR code
Scroll down to "SSL Support", toggle this option and click on "Generate CSR" button. CSR stands for the Certificate Signing Request which is basically an unsigned certificate code. You will need to send this code to your Certificate Authority to get the certificate signed and issued.
 Let's take a look closer here.
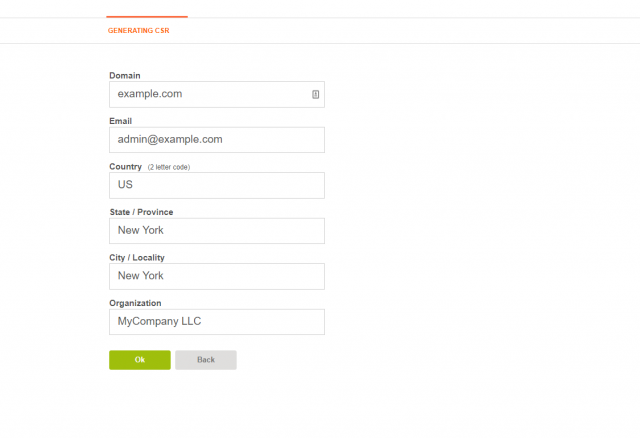
- Domain. Just use the domain name you want to secure with a certificate.
- Email. This information will not be shown in the certificate, just put your email address.
- Country, State and City. Just use your address, this information will not be shown as well. In case you have organiation validated (OV) or extended validated (EV) SSL certificate, address details will be required separately by your certificate provider.
- Organization. Feel free to use your organization name or your name in case you don't have any organization.
Click OK to generate the CSR.
On the next page you will see three codes: - SSL CSR. The code you need to send to your certificate provider/authority. - SSL Certificate. This is a self-signed (in other words "not trusted" certificate) which was generated automatically on the server. There is no need to use it. - SSL Key. Your private key code which should be kept in a safe place (your server or local machine is a good option). Just don't share it with anyone, it will be required to get the certificate installed.
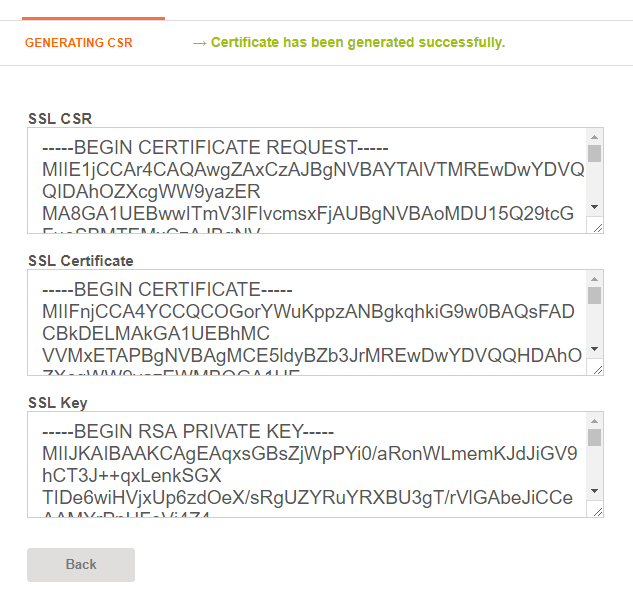
Feel free to go back to the main page of Vesta CP. On this point you need to send the CSR to your provider/certificate authority to get the certificate validated. You will need to validate the certificate as well (the process differs for different certificate types) and then your certificate will be issued and you will receive the certificate and Certificate Authority Bundle (chain) files from your certificate provider.
Fourth step: install the certificate on Vesta CP
Once you have all those files, go back to domain editing page. Here you should toggle "SSL Support" option and put the codes to corresponding boxes:
- your certificate code with -----BEGIN CERTIFICATE----- and -----END CERTIFICATE----- headers to SSL Certificate box;
- your private key code which has -----BEGIN RSA PRIVATE KEY----- and -----END RSA PRIVATE KEY----- headers to SSL Key box;
- the CA Bundle code with -----BEGIN CERTIFICATE----- and -----END CERTIFICATE----- headers to SSL Certificate Authority / Intermediate box. Usually contains a few certificates in one file. This field is optional, but we recommend using the CA Bundle in order to avoid non-trusted error messages in browsers.
Click on Save button to apply the settings.
Congratulations! Now you have your certificate installed and working correctly. You can access your website via https://yourdomain.com.
That's all. Keep it secure!
comments (1)
Soma
- 7 years agoHelpful tutorial