


Installing Jenkins on your Centos 7.4 VPS server
Introduction
We live in the world of fast-paced development, delivery and automation. Continious Integration and Continious Delivery became a huge part of modern development process, and Jenkins is often implemented as the automated server solution. It is a fork of popular Hudson project, is Java based, used by many companies, and you can use it for different purposes: run tests for your software, triggering on specific commit, build new versions of your software, perform a lot of different automated processes. I am going to describe how to setup Jenkins on your Centos 7.4 VPS server, so you can use it for your experiments, learn how to use it, and possibly use in your projects.
Prerequsites
1) Centos 7.4 VPS server
2) Basic skills to edit files in Linux systems, install/remove packages and manipulate services
Install Java
yum install java-1.8.0-openjdk
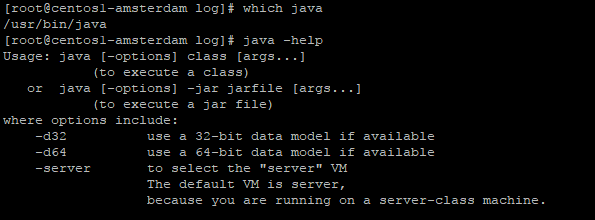
After installation check that java is properly added to environment variables and accessible to system
which java
java -help
You should see that java is available ( java -help output is truncated to space screen space )
 2) Setup JAVA_* variables for your environment
run
2) Setup JAVA_* variables for your environment
run
readlink /etc/alternatives/java
ls -l
and locate the jvm dir
 Now, when we now where jvm dir, let's set a couple of important JAVA_ variables:
export JAVA_HOME=/usr/lib/jvm/jre-1.8.0-openjdk
export JRE_HOME=/usr/lib/jvm/jre
echo JAVA_HOME=/usr/lib/jvm/jre-1.8.0-openjdk >> /etc/environment
echo JRE_HOME=/usr/lib/jvm/jre >> /etc/environment
check that variables are added OK:
echo $JRE_HOME
echo $JAVA_HOME

Install Jenkins
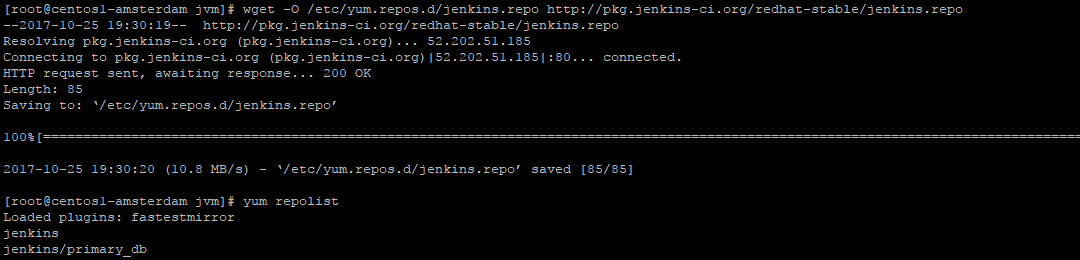
The best way of obtaining Jenkins is getting it from official upstream repositories. Download the official jenkins repo file and check that it is added without any problems
wget -O /etc/yum.repos.d/jenkins.repo http://pkg.jenkins-ci.org/redhat-stable/jenkins.repo
yum repolist
 install jenkins repository public key
rpm --import http://pkg.jenkins-ci.org/redhat-stable/jenkins-ci.org.key
install jenkins package
yum install jenkins
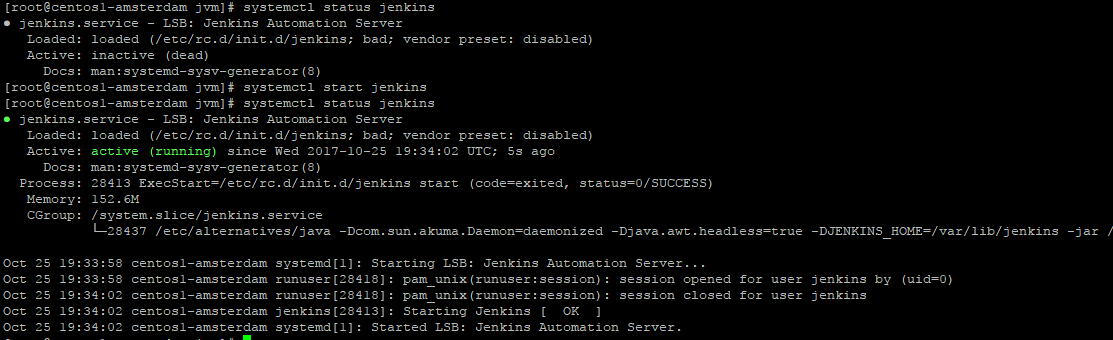
After succesfull installation of Jenkins package, start the process and check that there are no problems with it
systemctl start jenkins
systemctl status jenkins
 Great! Now you have Jenkins installed. Let's prepare it a bit for work.
Initial Jenkins setup
By default Jenkins is available on port 8080. Open browser, and open your Jenkins web interface by printing into address tab your VPS ip with added 8080 port, 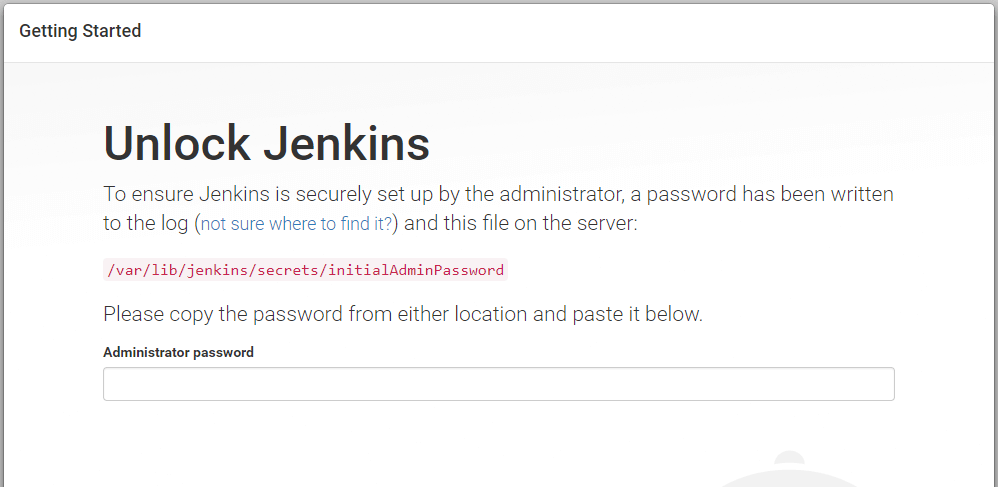
On your VPS server run cat /var/lib/jenkins/secrets/initialAdminPassword
copy the result and paste it into Jenkins web interface. You'll see that Jenkins offers you to install suggested plugins or selecting the list of plugins.
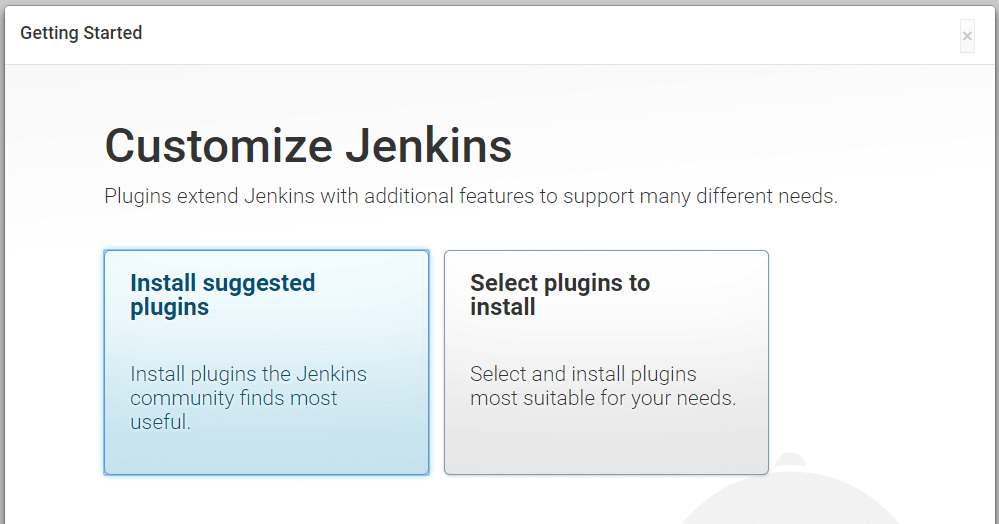
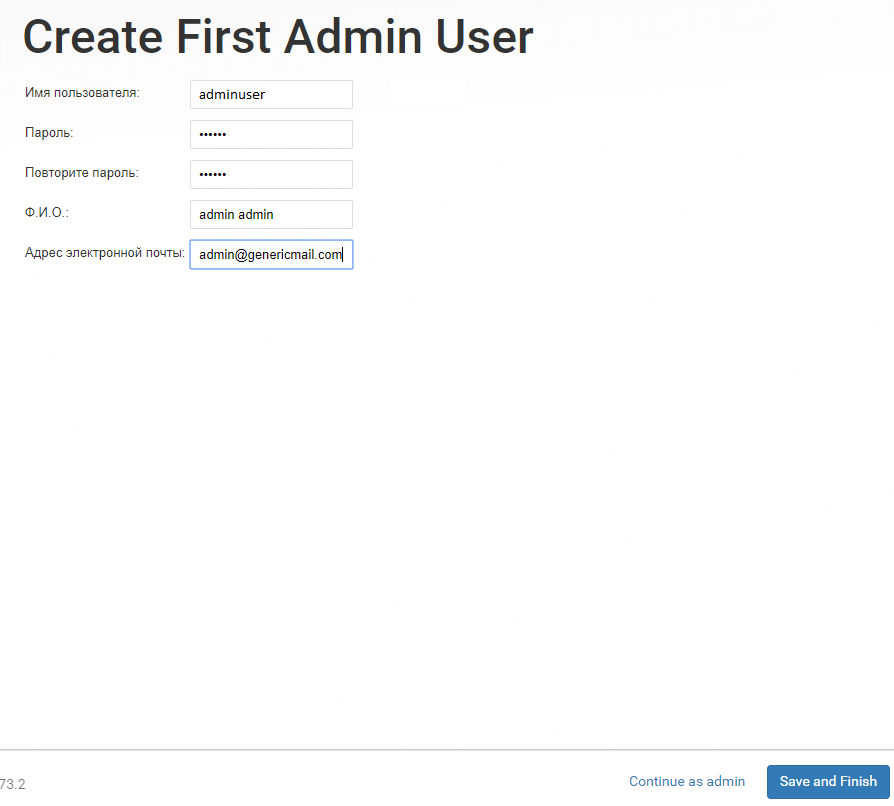
If you are new to Jenkins, you'd better choose the suggested list. After the installation process, you will be dropped to Jenkins web-interface with a prompt to create you admin user, please fill it with actual data and press
continue as admin
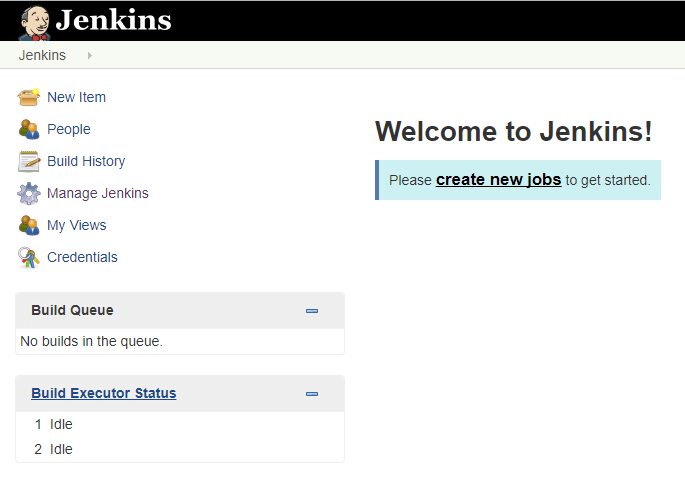
You'll be dropped to Jenkins main menu, and now you can start experimenting with your new Jenkins instance!
Conclusion
Now you know how to setup your own Jenkins instance. It is a very powerful tool, that you can use for different purposes. You already have a few workers setup, so you can immediately start running some tasks. It has a user friendly web interface, a lot of documentation, and good perfomance. Do not forget to check plugin list to see what features you may add to your already deployed instance.
Related Tutorials
Setting up a Docker instance on your CentOS 7.4 VPSInstall Percona Server 5.7 MySQL on Ubuntu, CentOS or Debian
Locating files on your Linux VPS system using whereis, which, whatis, readlink, find
Enabling sudo for your user on Ubuntu 17.04 and CentOS 7.4
Using SFTP protocol to access file on your VPS with Filezilla client